Showing posts with label ice cream. Show all posts

Thursday, November 10, 2016

Butter Pecan Ice Cream

Butter Pecan Ice Cream

This ice cream pretty much stole the show when I made this for Thanksgiving last year. It is really really good. Note that the recipe calls for whole eggs rather than the usual egg yolks. Worked totally fine that way.

Butter Pecan Ice cream
Adapted from a recipe available from Epicurious originally published in Gourmet, 2002

2 cups shelled pecans (1/2 lb.), finely chopped (I scaled back to 1 1/2 cups, noting that many Epicurious commenters noted they thought 2 cups was too much and used less)
3 tablespoons unsalted butter, softened (doesn't need to be, as the pecans will be very hot)
1/4 tsp. salt
1 1/2 cups packed light brown sugar
2 tsp. cornstarch
4 large eggs, lightly beaten
2 cups whole milk
2 cups heavy cream
3/4 tsp. vanilla extract

1. Preheat oven to 350 F.

2. Spread pecans on a baking sheet (lined with foil for easy cleanup) and toast in the oven until fragrant and slightly darker, about 7 to 8 minutes (watch the nuts to avoid burning them). Remove nuts from oven, transfer to a bowl (they will be hot). Add butter and salt to hot pecans and toss until butter is melted, then set nuts aside to cool completely.

3. Stir together the brown sugar and cornstarch, then add the eggs and stir until combined (you can try using a whisk for this, since the original recipe says to "whisky" but I think using a spoon or spatula will work much better, as the whisk tends to fling ingredients too easily). Bring milk and cream just to a boil in a 3- to 4-quart heavy saucepan over moderately high heat, (reduce heat to medium-low) then add to egg mixture in a stream, whisking constantly, and transfer custard to saucepan. (rather than add the hot milk to the bowl and transfer back to the pan, I just added the egg mixture to the pan while whisking constantly).

Cook custard over moderately low heat, stirring constantly with a wooden spoon, until thick enough to coat back of spoon and registers 170 to 175°F on an instant-read thermometer, 2 to 3 minutes (do not let boil).

Immediately pour custard through a fine-mesh sieve into a bowl and stir in vanilla, then cool, stirring occasionally. Chill custard, its surface covered with wax paper, until cold, at least 3 hours.
Freeze custard in ice cream maker until almost firm. Stir together ice cream and pecans in a bowl, then transfer to an airtight container and put in freezer to harden.

Thanksgiving Central

Wednesday, July 15, 2015

Mocha Baked Alaska

Mocha Baked Alaska

Baked Alaska is one of my favorite cooking "magic tricks." It's baked ice cream. That doesn't melt. What?!

Despite "molecular gastronomy" being a fairly recent invention, Baked Alaska, is a historic dish. Its origins go back to the 1800s when desserts made of ice cream encased in a cooked layer--sometimes pastry or the meringue that is traditional of Baked Alaska today. Chef Charles Ranhofer of the famed Delmonico's in New York is credited with naming and popularizing the dish in the late 1800s as a way to celebrate the United States' acquisition of Alaska. I've read that the browned meringue is meant to evoke the snowy mountains of the state, while the dessert's frozen center gets to the heart of the state's notorious northern temperatures.


But how does it work? The layer of meringue--an egg foam--insulates the ice cream from the heat of the oven while it cooks, keeping the ice cream from melting. Food scientist Harold McGee explains the science simply in On Food and Cooking: "Egg foams are often used to cover and conceal the heart of a dish. Among the most entertaining of these constructions is the hot, browned meringue enclosing a mass of chilly ice cream: the baked Alaska, which derives from the French omelette surprise. This thermal contrast is made possible by the excellent insulating properties of cellular structures like foams. For the same reason, a cup of cappuccino cools more slowly than a cup of regular coffee."


Hence, it's important to "seal" the ice cream by spreading the meringue all over the cream and sealing it against the cake base.

This particular version is inspired by the Chocolate Baked Alaska served at the Casey Jones restaurant in La Plata, Maryland. It was a Casey Jones I first had Baked Alaska, and I absolutely loved it. The chocolate cake, espresso/chocolate chip ice cream (I used a gelato actually) and meringue are a wonderful combination. I could think of no better way to celebrate our return from Alaska than by making this dish again.


Mocha Baked Alaska
Inspired by Chocolate Baked Alaska, Casey Jones, La Plata, Md.

Single layer of chocolate cake (see recipe below)
Pint of coffee/chocolate chip or plain coffee ice cream or gelato, slightly softened
4 egg whites
1/4 tsp. cream of tartar
1 tsp. coffee liqueur (such as Kahlúa)
1/3 cup sugar

1. Line a baking sheet with parchment paper.

2. Using a 3-inch round cutter, cut the cake layer into four round pieces. Eat any remaining cake scraps (you know you want to). Place the cake rounds evenly spaced on the lined baking sheet. Place in the freezer until the cake is frozen, at least 2-3 hours.

3. Remove the cakes from the oven. Place a rounded scoop of ice cream (about 3/4 cup) on each cake. Return to the freezer to freeze hard, about 2-3 hours.

4. Make the meringue: Add the egg whites to the bowl of a stand mixer or a large mixing bowl (if using a hand mixer). Beat on high until frothy. Add the cream of tartar and continue beating on high until soft peaks form.Beat in the coffee liqueur, then gradually beat in the sugar. Continue beating until stiff peaks form (the meringue will appear glossy, dip a spoon through it and a peak will form that does not fold back down). Be careful not to overbeat.

5. Remove the cakes from the freezer. Using a spatula, spread the meringue evenly over the ice cream, sealing the meringue against the cake. If desired, use a spoon to make decorative spikes. Put back in the freezer until well frozen, at least 3-4 hours.

6. Adjust oven rack to center position and preheat oven to 500 F. Bake desserts until meringue is set and lightly browned, about 3 minutes. Serve immediately.


Single Chocolate Cake Layer
Adapted from Old-Fashioned Chocolate Layer Cake, The New Best Recipe by America's Test Kitchen

6 tbsp. unsalted butter, at room temperature, plus more for greasing the cake pan
1/2 cup plus 2 tbsp. all-purpose flour, plus more for flouring the cake pan
1/2 cup plus 2 tbsp. sugar
1 large egg
1/4 tsp. baking soda
1/4 tsp. salt
1/4 cup cocoa powder
1 tsp. instant espresso powder
1/2 cup plus 1 tbsp. milk
1 tsp. vanilla extract

1. Preheat oven to 350 F with rack in middle position.

2. Grease an 8- or 9-inch round cake pan with butter. Place a round of parchment in the bottom of the pan. Grease the parchment. Flour the cake pan, tapping out the excess flour.

3. Beat the butter in the bowl of a stand mixer (or in a bowl using a hand mixer) on medium-high speed until creamy. Gradually add the sugar and beat the mixture until fluffy, about 3 minutes. Add the egg and beat another minute.

4. Whisk together the flour, baking soda, salt, cocoa powder and espresso powder. Combine the milk and vanilla in a liquid measuring cup.

5. With the mixer running on slow speed, add about half the dry mixture to the butter mixture, then add about half the milk. Repeat with the remaining dry ingredients and remaining milk. Scrape down the sides of the bowl and beat on low speed for another 15 seconds until the batter has an even texture.

6. Pour the batter into the prepared cake pan and smooth the top with a spatula. Bake until a toothpick inserted into the center of the cake comes out clean, about 23-30 minutes. Set the cake on a rack to cool for about 10-15 minutes. Run a plastic knife around the edge of the cake, then invert the pan to release the cake onto the cooling rack and cool completely.

Thursday, March 19, 2015

Black Tiger Espresso Ice Cream and Milkshake

Coffee People Black Tiger Espresso Ice Cream Milkshake

Being a teenager in Portland during the '90s meant that I was exposed to coffee shops at pretty young age. We had Starbucks everywhere, but several other local chains too, plus many, many independents.

My favorite chain coffee-shop was Coffee People, an Oregon-based chain started by Jim and Patty Roberts. By the early '90s there were a lot of Coffee People locations, including two pretty close to my house in Beaverton--one of which was a drive-thru, not a common thing back then. My favorite store of their was the location on NW 23rd Avenue, a tree-lined walkable street lined with cafes and shops that I loved to visit, especially as a high-schooler.

And my favorite treat to get at Coffee People was the Black Tiger milkshake. To this day, I don't understand why more coffee shops don't also offer milkshakes, since a coffee milkshake is an amazing thing. The shake was made with Coffee People's own Black Tiger ice cream, which I think you could also buy back then. It was unique for having coffee grounds mixed into the ice cream, giving it a grainy but not unwelcome texture. The drink was topped with whipped cream and a chocolate-covered espresso bean. As if this wasn't enough of a caffeine jolt, I believe you could get an extra shot of espresso added to it too.

Coffee People went into decline in the late '90s. The original owners sold the business, which exchanged hands before disappearing almost completely (a lone kiosk at PDX airport became all the remained)--a pretty fast decline from its peak of 40 plus stores in its heyday, according to this Willamette Week article. The blog Caffeinated PDX has a great history of the company and interview with Jim Roberts.

Lately, however, Coffee People is making a beautiful comeback. I spotted the Coffee People kiosk at the PDX airport last summer, and picked up some Black Tiger coffee (now made by Green Mountain Coffee). I hadn't noticed the kiosk for a few years. I thought it had closed, although perhaps it had just relocated to a part of the airport I never see. Regardless, it got me thinking about Coffee People and whether it could be making a comeback.

Turns out it is...sort of. Almost 13 years ago, Jim & Patty opened their own independent coffee shop, Jim & Patty's, with a lot of the same marketing touches that made Coffee People special (including the iconic catchphrase: "great coffee. no backtalk"). In 2013, Jim & Patty's expanded to suburban Beaverton, and they recently opened a third location not far from where the Coffee People I frequented on 23rd Avenue was located.

And, of course, The Black Tiger milkshake is on the menu. With the Black Tiger espresso beans I picked up in the airport last summer, I wanted to try a recreation of that classic '90s Portland treat. I made a basic espresso ice cream using the Black Tiger grounds--leaving the grounds in, of course. The ice cream is delicious on its own, but I knew I had to make it into a milkshake too. Just like it used to be served in Coffee People, I topped it with whipped cream and a chocolate-covered espresso bean, a garnish that was surprisingly hard to find in D.C. (Were they never popular in D.C.? They used to be quite common in Portland). With the weather finally starting to warm up, a good coffee shake is a great way to relax (with a bit of a jolt) on a warm day.


Black Tiger Espresso Ice Cream
Adapted from multiple ice cream recipes, notably by America's Test Kitchen and Ina Garten

1 3/4 cup heavy cream
1 1/4 cup whole milk
1/2 cup plus 2 tbsp. sugar
1/3 cup light corn syrup
1/4 tsp. salt
6 egg yolks
2 1/2 tbsp. finely ground espresso beans
1 tsp. vanilla extract

1. Combine ceram, milk, sugar, corn syrup and salt in a large (4 qt.) saucepan. Heat over medium-high heat until the mixture forms bubbles around the edges and makes a little steam (175 F on an instant-read thermometer). Remove from heat.

2. In a medium bowl, whisk the egg yolks together. With whisk in one hand, slowly pour about a cup of the warm cream mixture into the egg yolks, whisking the egg-cream mixture constantly as the cream is added. Add the egg-cream mixture back into the mixture in the saucepan, whisking to combine. Return to the saucepan to the stove over medium-low heat and cook, stirring constantly, until the mixture thickens and reaches 180 F on an instant-read thermometer (if the mixtures reaches this temperature before it thickens, remove the pan from the stove for a couple minutes, turn the heat down a bit, and then return it to the stove). The mixture should be thick enough to coat a spoon.

3. Remove the saucepan from the heat and stir in the espresso and vanilla. Allow it to cool a bit, then pour it through a fine-mesh sieve into a large (gallon-size) Ziplock bag. Seal the bag and place it in an ice water bath (this will cool it quickly if you want to churn it soon; if not, you can cool it in the refrigerator). Allow the mixture to chill.

4. When chilled, process the mixture in an ice cream maker until its texture resembles soft-serve ice cream. Transfer ice cream to a container and freeze until hard.

Black Tiger Milkshake
Inspired by the Coffee People classic

3 scoops (about 1 and 1/2 cups) Black Tiger ice cream (recipe above)
1/4 cup milk
Generous dollop of sweet whipped cream (recipe below)
1 chocolate-covered expresso bean

Add ice cream and milk to a blender. Blend until smooth. Add additional milk if it's too thick. Poor into a chilled pint glass. Top with whipped cream and a chocolate-covered espresso bean.

Sweet Whipped Cream

1 cup heavy cream
1 tbsp. powdered (confectioners) sugar
1 tsp. vanilla extract

Whisk together the cream, powdered sugar and vanilla extract until the sugar is well-combined and not lumpy. Whip the cream by hand (takes a long time) or with a stand mixer until stiff and fluffy. Alternatively, add the cream mixture to an ISI cream siphon and charge with 1

Friday, November 21, 2014

Thanksgiving Ice Creams

Pumpkin Spice Ice Cream

"Pumpkin spice" might be a dirty word to some, but to many, it's still a welcome flavor during fall and especially at Thanksgiving. This pumpkin spice ice cream uses a lot of the same spices you find in a pumpkin pie--cinnamon, allspice, ginger, clove and nutmeg--just in ice cream form.

The other ice cream, ginger and brown sugar, I made specifically to go with apple pie. Both recipes  use Jeni Britton Bauer's technique from her cookbook, Jeni's Splendid Ice Creams at Home.

Pumpkin Spice Ice Cream
Technique adapted from Jeni's Splendid Ice Creams at Home by Jeni Britton Bauer

2 cups whole milk
1 tbsp. plus 1 tsp. cornstarch
3 tbsp. cream cheese, softened
1/4 tsp. salt
3/4 cup (about 1/2 a 15 oz. can) pumpkin puree
1/4 cup honey
1 1/4 cups heavy cream
2/3 cup brown sugar
2 tbsp. light corn syrup
1/2 tsp. ground cinnamon
1/2 tsp. ground ginger
1/4 tsp. of nutmeg
1/8 tsp. of allspice
Pinch of ground cloves

1. In a small bowl, combine 2 tbsp. of the milk with the cornstarch, whisking with a fork until smooth.

2. In a large bowl, whisk together the cream cheese and salt. Add the pumpkin puree and honey and whisk until smooth.

3. In large (4 qt.) saucepan over medium-high heat, combine the remaining milk, cream, brown sugar, corn syrup and spices and bring to a boil. Boil for 4 minutes (watch carefully to prevent boiling over).  Remove pan from heat and gradually whisk in the milk/cornstarch mixture. Return to boil and cook, stirring frequently, for about a minute longer. Remove from heat.

4. Gradually pour the hot milk mixture into the bowl with the pumpkin mixture, whisking constantly to combine with the pumpkin until the mixture is smooth. Pour the mixture into a 1-gallon bag. Allow to cool, then refrigerate until cold (if desired, place the filled bag in an ice water bath to cool faster).

5. Process the mixture in an ice cream maker until it is thick and creamy. Transfer to a container and freeze until hard, at least 4 hours.


Ginger-Brown Sugar Ice Cream
Technique adapted from Jeni's Splendid Ice Creams at Home by Jeni Britton Bauer

2 cups whole milk
1 tbsp. plus 1 tsp. cornstarch
3 tbsp. cream cheese, softened
1/8 tsp. salt
2-3 inches of fresh ginger root
1 1/4 cups heavy cream
2/3 cup light brown sugar
2 tbsp. light corn syrup

1. Whisk 2 tbsp. of the milk with the cornstarch in a small bowl (I use a 1-cup liquid measuring cup). Set aside. Whisk the cream cheese and salt in a medium bowl until smooth.

2. Whisk cream cheese salt in a large bowl (I use an 8-cup liquid measuring cup).

3. Peel and chop the fresh ginger until there's a heaping 1/4 cup. Add to a 4-quart saucepan with the cream, brown sugar, corn syrup and remaining milk. Bring to a rolling bowl over medium-high heat. Boil mixture for 4 minutes, watching carefully and stirring frequently to avoid boiling over. Remove from heat and let steep for 10 minutes.

4. Slowly whisk in the cornstarch slurry and return mixture to medium-high heat to boil for an additional minute to thicken. Remove from heat, strain to remove ginger pieces, and gradually whisk hot mixture into cream cheese until smooth. Pour mixture into a large gallon-size zip lock bag and submerge sealed bag in an ice water bath. Once cooled, you can store this mixture in the fridge for awhile or proceed with processing the ice cream in step 5.

5. Pour mixture into an ice cream maker and process until thickened and frozen, about 25 minutes. Transfer to a storage container and freeze fully in the freezer.

Other recipes

Thanksgiving central (links to all Thanksgiving recipes and articles)

Old-Fashioned Texas Pecan Pie

Bourbon-Caramel Pumpkin Tart

Apple Pie with Vodka Crust

Wednesday, July 2, 2014

The Feed: July 2, 2014

Sweet Corn Ice Cream with Blackberries, in honor of the New York Times Dining section's ice cream issue.
The Feed is my weekly round up of interesting food-related stories from newspapers, magazines, blogs and websites.

New York Times: “The Only Ice Cream Recipe You’ll Ever Need,” by Melissa Clark.
Summertime and ice cream are a classic pairing that always brings a smile. Today’s Dining section is an ode to the frozen staple that’s oh-so-good when the mercury climbs. Clark covers the fundamentals of making ice cream from a standard egg-yolk base recipe that’s ripe for flavor experimentation. She offers lots of flavor ideas in this recipe-infographic.

 New York Times: “You Say Soft, I Say Serve,” by Jennifer Steinhauer.
It may seem low-brow next to today’s wave of artisanal gelatos and fro-yo chains, but soft-serve ice cream just hits the spot sometimes. Steinhauer says it all with this passage: “A soft-serve cone should be procured whenever possible at the beach, while hopping from foot to foot to avoid the searing heat of sand that has baked in the midafternoon sun, or after Little League practice, preferably with a passel of 8-year-olds who smell vaguely equine.”

Washington Post: “Daniel Boulud: On Fine Dining and Why he Left Washington,” by Tim Carman.
Daniel Boulud is one of the country’s most renowned chefs, famous for New York’s Daniel as well as a mini-empire of other New York establishments. The news that he’s opening a version of DBGB in D.C. is quite exciting. Carman sat down with Boulud for this 90-minute interview, discovering in the process that Boulud almost established himself in D.C. instead of New York. I also enjoyed the companion piece about a recent dinner Boulud hosted for 35 of D.C.’s top chefs—the guest list really is a who’s who of D.C. chefs.

Washington Post: “Weeknight Vegetarian: A Glut of Cucumbers, Cool as Ever, Makes for a 'Creamy' Soup,” by Joe Yonan.
I’ve recently been interested in recipes that develop “creamy” texture without the use of cream. Like the Mexican-themed pasta I featured recently made with a “creamy” sauce of pureed avocado. So I was intrigued by Yonan’s recipe for Cold Cucumber Cream with Tomato Salsa, which he says has a “slightly gelatinous, almost creamy mouth feel.”

Been There Eaten That: “The Sensation Minibar,” by Lori Gardner.
Ever wonder what it would taste like to enjoy a 26-course dinner featuring innovative modernist cuisine overseen by one of the country’s most famous (and definitely our city’s most famous) chefs? Gardner recently found out, having been treated to an evening at José Andrés’ Minibar. Reading about her night there is a delicious vicarious experience.

Love & Lemons: “Feta & Harissa Fattoush Salad,” by Jeanine Donofrio.
I love panzanella, but I’ve never made fattoush. I wasn’t really sure what it was actually until reading this post. Basically, it’s like Middle Eastern panzanella, which means it’s probably amazing and perfect for summertime.

Wall Street Journal: “Forget Dinner. It's Always Snack Time in America,” by Mike Esterl.
It’s not exactly news that Americans eat a lot of snacks, but what Esterl manages to make interesting about this story is how that has impacted the food industry. For those who argue that snacking is healthier than three-squares, this story reports the science is still out on that.

Monday, December 30, 2013

Best of 2013: Desserts


It might be hard to believe if you visit around the holidays, but normally, we don't eat dessert often at our house. Certainly, it's not with every meal or even every week. But every now and then, it's nice to have a really good sweet treat. Not some "light" diet-oriented dessert. Uh-uh. I'm talking something satisfying and decadent. I'd rather have dessert only every now and then and have it be incredible than have low-cal desserts all the time.

Cakes and Pies

I loved this unique Coffee Cake with Coffee Frosting from a recipe by The Pioneer Woman was the perfect winter treat, while Melissa Clarks' recipe for Strawberry Shortcake with Lemon-Pepper Syrup was just as good for summer. Another unusual but tasty cake was the Gin & Tonic Cake, inspired by my favorite cocktail. For out-and-out decadence, nothing tops this Chocolate Truffle Cake, from a recipe by Chef Naomi Pomeroy.

For Thanksgiving, I was blown away by Fine Cooking's recipe for Bourbon-Caramel Pumpkin Tart. And my Apple Custard Pie with Gingersnap Cookie Crust was my effort to combine the best of apple pie and pumpkin pie into one holiday treat.

Ice Cream

I didn't make as much ice cream this year, but when I did, I went for interesting, seasonal flavors. Last winter, I created the By the Fire Sundae with maple-bacon ice cream, a brown butter blondie, caramel and smoky whipped cream. In the spring, taking advantage of my favorite herb, I made Mint-Chocolate Chip Ice Cream. And in the summer, I discovered that sweet corn is just as great for dessert as a dinner side in Sweet Corn Ice Cream with Blackberry Sauce.

For lovers of ice cream pie, there's also this wonderfully festive Cereal Milk Ice Cream Pie with Compost Cookie Crust, an ode to the creative ideas of Momofuku Milk Bar Chef Christina Tosi (whose cookbook I got for Christmas--so look for more Momofuku treats next year).

Cookies

As usual, December featured lots of cookie recipes. My favorite were the Molasses Sandwich Cookies with lemon filling (we paired it with Almond Lace Cookies in this year's Dallas Desserts Holiday Bakeoff with Dallas Decoder). I also shared a recipe for Chocolate Saltine Bark, a longtime simple holiday favorite.

Another first this year: I attempted to create several original cookie recipes. My favorite were the Peanut Butter, Oatmeal and Chocolate Chip Cookies, which were like three great cookies rolled into one.

Thursday, October 3, 2013

Shutdown Survival Cooking

Shutdown survival cooking

Most of the recipes I write about on Cook In / Dine Out can be made in less than an hour. While I'm not aiming to write a convenience cooking site, it's just a practical matter: I work full-time and I don't have time to make elaborate meals during the week. When you do see longer recipes on my site, they're probably ones I made on a weekend.

With the federal government having shut down, many home cooks may find themselves with extra time to explore midweek cooking that's more involved than usual. Seize the opportunity to make something special for your family, your sweetie or just yourself. Besides filling time, a tasty cooking project can nourish your body and your soul. Plus, it provides the satisfaction of accomplishing something.

Below are some of the more time-intensive recipes I've featured, sorted by category. I've also discussed ways to cut costs on some of the recipes, since, non-pay status makes splurging on luxury food items feel like, well, a luxury. By their nature though, a lot of recipes that take a long time to cook don't use expensive ingredients. It's the time and care that bring out their good flavors.

Bolognesa Lasagna, Marcella Hazan Recipe
Bolognese lasagna, from Marcella Hazan's recipe, is a great afternoon cooking project with common ingredients.

Meats

The complex flavor of bolognese sauce comes from slowly cooking it over the course of the afternoon. This Bolognese-Style Lasagna takes the better part of the day to make, given the time for the sauce, assembling the dish and baking it. The recipe is from Italian-food cook Marcella Hazan, who died this week. Cost savings: nothing in this recipe is particularly expensive except possibly the tomatoes if you buy an imported brand.

Spice-Brined Roast Chicken will easily fill up several days, since it requires an overnight brine, drying time and the actual roasting. Cost savings: there's no getting around the cost of the chicken, although if you substitute whatever spices you have on hand for the brine, that's really the only cost in this dish.

Slow-cooking meats is the sort of day-long process I usually only have time for on the weekend. Slow cooking is a great way to treat pork shoulder which, in the Carnitas Tacos, gets an additional broil in the oven to crisp it up a bit. Although the pork has many hours of inactive cooking, this recipe will fill that time as you prepare the homemade corn tortillas and corn salsa, refried black beans and guacamole garnishes. Cost savings: the pork shoulder is the only major cost of this dish; the masa harina, while seemingly exotic to some, is less expensive (and way tastier) than store-bought corn tortillas. If you don't have a tortillas press, roll the balls of dough out between two sheets of plastic wrap or parchment to about 1/8-inch thickness.

Jacques Pepin's Beef Stew in Red Wine Sauce gets a good long roast in the oven.

Stews

The very word "stew" implies something that is cooked slowly over a period of many hours. I've made two really incredible stews this year that are well worth their time. Jacques Pepin's Beef Stew in Red Wine Sauce is about the best Beef Bourguignon I've ever had. The meat is first browned on the stove and then roasted in the oven with the wine for a long time. The vegetables are cooked separately and then combined in the end. Cost savings: use less-expensive beef chuck in place of flatiron steak; any red wine will work, although make sure it's one you would also drink (don't substitute a so-called "cooking wine"). 

Smoky Red Wine, Pinto Bean and Bacon Soup, an absolutely wonderful recipe by New York Times writer Melissa Clark, still takes hours to prepare, despite the time I shaved off by cooking the beans with a faster method. If you love beans and bacon, this is the best way I've ever had them together. Cost savings: using dried beans is more economical than canned; use any red wine you have on hand, but don't substitute a bad wine or that will be reflected in your dish.

Sweet Corn Agnolotti
Sweet Corn Agnolotti, from a recipe by Mike Isabella, takes time to prepare the filling, sauce and assembly.

Homemade Pasta

It's so easy to open a box of dried pasta and boil it. It's another thing to make your own. Fresh pasta has a flavor and texture that dried pasta just cannot beat. For something simple, try Fresh Pasta with Homemade Ricotta and Roasted Tomato Sauce (homemade ricotta is another good cooking project). For something more involved, try Toasted Fazzoletti with Mushrooms and Hazelnuts or, if you're really up to a challenge, Sweet Corn Agnolotti with Mushrooms, from a recipe by Mike Isabella of Graffiato and Top Chef. Cost savings: Although pasta (semolina) flour is often recommended, you can make pasta with standard all-purpose flour. Substitute sauce ingredients as needed. 

Homemade Gnocchi with Sausage-Mushroom Ragu
Homemade gnocchi is worth the effort as it's much better than store-bought.

Gnocchi

Gnocchi dishes come together in a snap if you use store-bought gnocchi. Making your own takes time, but I think you'll find it's worth it. You can get much lighter, tastier dumplings if you make them yourself. Although potato is traditional, such as in Gnocchi with Sausage-Mushroom Ragu, using other root vegetables like sweet potatoes (Sweet Potato Gnocchi with Sage) or beets (Beet Gnocchi with Walnut-Sage Butter) are more flavorful. Cost savings: at their most basic, gnocchi are just potato, flour, egg, salt and water, so they're pretty inexpensive; it's the sauces that may set you back more, so feel free to experiment and substitute with what you have on hand.

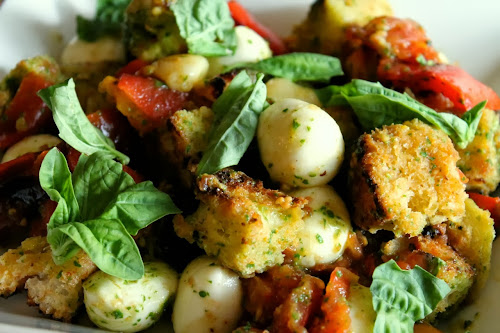
Roasted tomato panzanella
At the tail end of tomato season, it's the perfect time to roast tomatoes and use them in something like this panzanella.

Roasted Tomatoes

It takes a good 2 1/2 to 3 hours to roast tomatoes, so any of the dishes I've made with them will take at least the afternoon to prepare. Homemade roasted tomatoes are amazing--such a depth of flavor. Recipes include Creamy Roasted Tomato Gazpacho, Roasted Tomato Risotto, Tomatoes Two-Ways Pasta, Pizza, Roasted Tomato Panzanella and even Roasted Tomato Cocktails. Cost savings: although I strongly recommend using fresh, seasonal tomatoes, even grocery-store tomatoes will improve with roasting.

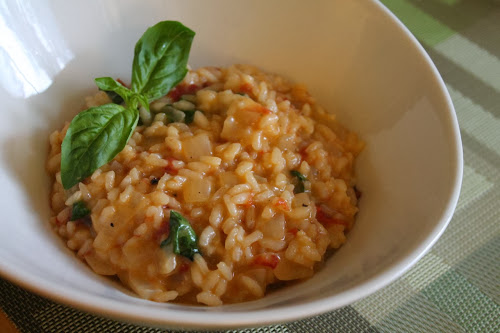
Roasted Tomato Risotto
Making your own broth, such as roasted tomato broth, greatly enhances the flavor of this risotto over a store-bought substitute.

Stock

For lots of recipes, I turn to the 2- or 4-cup boxes of premade stocks and broths, which is an enormous time-saver for midweek cooking. But if you have the time, homemade stock is worth it. I've made two vegetable stocks that I really like: one for Navy Bean Soup with Kielbasa and another with Roasted Tomatoes that I used for making risotto. Cost savings: As money-saving dishes go, stocks are one of the best, since you can use whatever vegetables (including scraps) and seasonings you have on hand.

Blackberry-Vanilla Ice Cream Pie with Corn Cookie Crust
Blackberry-Vanilla Ice Cream Pie with Corn Cookie Crust requires first making two separate recipes and putting them together into a delicious final product.

Desserts

The fastest way to slow down a dessert is to add multiple stages. Ice cream pies, for example, require first making cookies and pulverizing them to form the crust ingredients, plus making the ice cream, before forming the crust, spooning in the ice cream and freezing it. It's a great way to showcase unique flavor combinations. Check out Cereal Milk Ice Cream Pie with Compost Cookie Crust or Blackberry-Vanilla Ice Cream Pie with Corn Cookie Crust. Cost savings: for the corn cookies, substitute either corn flour or a mix of fine corn meal and flour for the ground freeze-dried corn. Ingredients in the compost cookies can be substituted for whatever snacky things you have on hand--various chips, nuts, etc. 

In addition to being a multi-stage dessert, Cereal Milk Baked Alaska with Brown Butter Cake requires extra time in the freezer between steps (very important time, by the way; the first time I made Baked Alaska I skipped some freezer time and really regretted it). Caramelized Parsnip Layer Cake requires extra time to first prepare, roast and mash the parsnips. Cost savings: for the cereal milk ice cream, substitute any flavorful sugary cereal for the Cinnamon Toast Crunch if you don't have that (Honey-Nut Cheerios would be good, I bet); carrots could be used instead of parsnips in the cake.

Tuesday, September 24, 2013

Cereal Milk Ice Cream Pie with Compost Cookie Crust

Cereal (Lucky Charms) Milk Ice Cream Pie with Compost Cookie Crust

Yesterday I wrote about Compost Cookies and teased an even more epic dessert they were to be incorporated into. Here it is: Lucky Charms Ice Cream Pie with Compost Cookie Crust. Enough sweetness for you?


Separate the marshmallows from the oat shapes, then pulse the oats a bit in a food processor.

Like Compost Cookies, Cereal Milk Ice Cream is the creation of Momofuku pastry chef Christina Tosi. The basic principle is to saturate milk with the flavor of cereal--like the dregs in your bowl--then use that to make ice cream. For a baked Alaska last summer, I used Cinnamon Toast Crunch. For this pie, I decided to give Lucky Charms a try.

Because the marshmallow colors tend to run together and form a greenish-gray color, I picked the marshmallows out first, with the intention of stirring them back into the ice cream at the end. The remaining oat cereal pieces are surprisingly (or perhaps not, depending on your outlook of the cereal industry) sweet on their own, giving the ice cream a nice oat-sweet flavor.


Four Compost Cookies were exactly the amount I needed to make this pie crust.

For the Compost Cookie crust, I first baked the cookies and then pulverized them with a little more added butter to form a cookie crust for the pie. In making the cookies, I deviated from Tosi's recipe by using graham cracker crumbs instead of her custom graham crust, which is a separate preparation of its own. Given all the flavors already going on in this dessert, I didn't miss it. The recipe from yesterday makes more than enough cookies for crust recipe; count yourself lucky that by making this you'll also get to enjoy a few compost cookies. They are amazing.

Perhaps the best part of making this dessert was that I got to showcase it alongside a group of coworkers' delicious creations in a Momofuku Milk Bar-themed afternoon dessert extravaganza. We all had sugar highs (and subsequent crashes) after that, but it was worth it.

Momofuku-themed desserts.


Cereal Milk Ice Cream Pie with Compost Cookie Crust
Inspired by and incorporating adapted recipes from Christina Tosi of Momofuku Milk Bar

250 grams (i.e. about 8 ounces or 1/2 pound) of Compost Cookies, about 3-4 large cookies
4 tbsp unsalted butter, melted
1 recipe cereal milk ice cream (see below), softened a bit if frozen hard

1. Process cookies in food processor until ground to a fine crumb. Combine crumb in bowl with melted butter. Press evenly on bottom and sides of a standard pie plate. Refrigerate until ready to use.

2. Transfer the ice cream into the pie shell in an even layer.

3. Freeze pie. Let set out about 15 minutes before cutting and serving.


Cereal Milk Ice Cream

Inspired by Cereal Milk Ice Cream, Momofuku Milk Bar

4 cups Lucky Charms cereal
4 cups whole milk
1 1/4 cups heavy cream
1/2 cup sugar
1/8 tsp. salt
5 egg yolks

1. Separate Lucky Charms' marshmallows and oat shapes. Set the marshmallows aside. Pulse oat shapes a few times in a food processor to break them up a bit. In a large (4 qt.) saucepan, heat milk and cereal over medium heat until the mixture starts to bubble. Remove from heat and allow to "steep" for about 30 minutes. Strain cereal mixture, pressing with a spatula to get out as much milk as possible, to yield about 2 cups (add extra whole milk if you end up with less than 2 cups).

2. Add cereal milk, heavy cream, sugar and salt to a large (4 qt.) saucepan over medium-high heat. Cook, stirring frequently, until the mixture reaches a temperature of 165 F.

3. Meanwhile, in a small bowl, whisk together egg yolks. Whisk in about 1/2 cup of the warm cream mixture to temper the eggs, then whisk the egg mixture into the warm mixture in the saucepan. Continue cooking, whisking constantly, until the mixture reaches 180 F.  Transfer mixture to a large (1 gallon) resealable bag. Submerge in an ice water bath for about 10 minutes then chill in the refrigerator until cold.

4. Process in an ice cream maker following maker's instructions. Once finished, transfer ice cream to a container and carefully stir in the marshmallows (don't over-stir or their color will run). Put in freezer and freeze until ready to use for the pie.

Friday, August 9, 2013

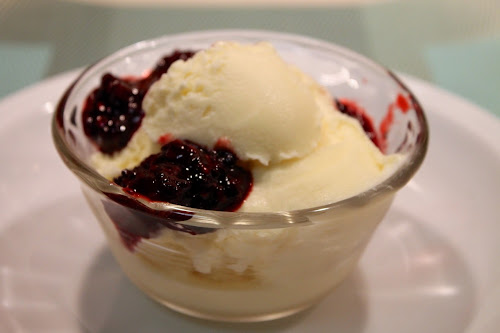
Sweet Corn Ice Cream with Blackberry Sauce

Sweet Corn Ice Cream with Blackberry Sauce

I was so enamored by the flavor of the reduced corn juice used in the Sweet Corn Agnolotti that I thought it would be delicious to use in making ice cream too. Apparently I'm not the only one who thinks corn ice cream is worth a try: Melissa Clark wrote about it in the New York Times last week.

Fresh sweet corn kernels
My technique is a little different than hers in that I extracted the corn juice and discarded the corn "pulp" rather than steeping the cream in it. I did also use the cobs though, so don't think this makes it any less "corny."


Since I've been using the Jeni Britton Bauer method of ice-cream-making a lot lately, I decided to go the more traditional egg custard route with this recipe. This ice cream has intense corn flavor and just the right level of sweetness.


I imagine any simple berry topping would be good on this. I decided to go with blackberries this time, but was awfully tempted by the blueberries (I'm saving them for panna cotta, which I hope to share with you soon).


Sweet Corn Ice Cream

6 ears of corn
2 cups heavy cream
1 1/2 cups whole milk
3/4 cup sugar
1/4 tsp. salt
5 egg yolks
Blackberry sauce (see recipe below)

1. Cut the kernels off the cobs and reserve the cobs. Scrape the cobs with the back of the knife to extract any remaining bits of corn and juice. Transfer kernels and scrapings to a food processor (fitted with the standard blade) and process for 1 1/2 minutes until pureed and smooth. Scrape down the sides of the bowl and process another 20 seconds or so to incorporate. Discard the cobs or keep them for another use (like making corn stock).

2. Place a fine-mesh sieve over a mixing bowl and strain the corn mixture, pressing on the solids to push through as much juice as possible (I did this in batches of about 1/3 cup, using the measuring cup to push on the solids, which worked really well). This should make about 1 1/2 cups of corn juice.

3. Transfer corn juice to a large (4 qt.) saucepan and cook over medium heat for about 5 minutes, stirring frequently, until the juice reduces to about 1 cup. Add heavy cream, whole milk, sugar, salt and reserved corn cobs. Increase heat to medium-high and cook until the mixture reaches a temperature of 165 F. Reduce heat to low and simmer for 15 minutes. Remove and discard corn cobs.

4. In a small bowl, whisk together egg yolks. Whisk in about 1/2 cup of the warm cream mixture to temper the eggs, then whisk the egg mixture into the warm mixture in the saucepan. Continue cooking, whisking constantly, until the mixture reaches 180 F. Strain mixture with a fine mesh sieve and transfer to a large (1 gallon) resealable bag. Submerge in an ice water bath for about 10 minutes then chill in the refrigerator until cold.

5. Process in an ice cream maker according to the manufacturer's directions. Transfer to a container and freeze until hard. Set out a few minutes to soften a bit before serving.

Cooking blackberry sauce
Cooking blackberry sauce.

Blackberry Sauce

1 cup fresh blackberries
1/4 cup sugar
1/4 cup water

Combine berries and sugar in a medium saucepan over medium heat. Cook, stirring frequently until the mixture boils, reduces and thickens, about 5-7 minutes. Stir in the water. Allow to cool and, if desired, strain out the seeds with a mesh sieve. Transfer sauce to a container to store in the refrigerator.

Saturday, May 4, 2013

Mint-Chocolate Chip Ice Cream


I'm wrapping up mint week with this delectable sweet treat: mint-chocolate chip ice cream. It's simple, classic and very satisfying.

For anyone that was expecting it to be green, please realize that mint ice cream is really white. It's only green if you add food coloring (and I didn't).

I used Jeni Britton Bauer's Backyard Mint Ice Cream as the basis for this and added dark chocolate chunks. I also used mascarpone instead of cream cheese, which I find is richer and more subtly flavored, thus less likely to distract from the flavor of the fresh mint in this recipe.

Mint-Chocolate Chip Ice Cream
Adapted from Backyard Mint Ice Cream, Jeni's Splendid Ice Creams at Home

2 cups whole milk
1 tbsp. plus 1 tsp. cornstarch
1 1/4 cups heavy cream

2/3 cup sugar
2 tbsp. light corn syrup

3 tbsp. mascarpone, softened
1/8 tsp. salt
Large handful of mint leaves (probably about 30 or so leaves), roughly torn into small pieces
4 oz. bittersweet chocolate, chopped

1. Whisk together 2 tbsp. of milk with the cornstarch in a small bowl.

2. In a large saucepan (4 qt.), combine remaining milk, cream, sugar and corn syrup, bring to a boil over medium-high heat and boil for 4 minutes (watch carefully to prevent boiling over).  Remove pan from heat and gradually whisk in the milk/cornstarch mixture. Return to boil and cook, stirring frequently, for about a minute longer.

3. Combine the mascarpone and salt in a large bowl. Gradually pour the hot milk mixture into the bowl, whisking constantly to combine with the mascarpone. Add the mint and pour the mixture into a gallon-size sealable plastic bag. Submerge bag in a large bowl filled with ice water until cold, about 30 minutes. Transfer to refrigerator to steep overnight.

4. Strain out the mint. Process the mixture in an ice cream maker until it is thick and creamy. Stir in the chopped chocolate. Transfer to a container and freeze until hard, at least 4 hours.

Friday, February 8, 2013

By the Fire Sundae


Brown butter blondie, maple-bacon ice cream, caramel and smoky whipped cream

Do a Google image search for “Valentine’s Day dessert” and this is what you’ll see: lots of chocolate, heart shapes and the color red. Of course those are all symbols of the lovers’ holiday many have come to regard as overtly commercialized and gimmicky. It seems the food has followed suit.

When making brown butter, watch it carefully to make sure it doesn't get too burnt.

Looking to bring the romance back, I wanted to create a Valentine’s Day dessert with a new point of view. When I envision a romantic setting, I think of something that’s intimate—just for two. I also think of sitting on the floor in front of a crackling fire with the lights dimmed or perhaps off.


So this dessert is more about mood and sense than iconography. Each element somehow represents fire, with alternating layers of burnt and smoky flavors. It’s a rich dessert, perfect for two people to share, ideally by a warm fire.


By the Fire Sundae for Two

One browned butter blondie square, about 3x3 inches (recipe below)
One large scoop of maple-bacon ice cream (recipe below)
Generous drizzle of caramel sauce (see recipe)
Dollop of smoky whipped cream (recipe below)

Place a warm blondie in the bottom of a wide, shallow bowl (microwave at 50 percent power for 40 seconds if blondie is cold). Top with a big scoop of ice cream. Drizzle with warm caramel sauce and top with a dollop of whipped cream.


Browned Butter Blondies
Adapted from Blondies by Cook’s Illustrated, July 2005 (recipe courtesy of Erin Cooks)

¾ cup unsalted butter (1 ½ sticks)
1 cup pecans (4 oz.)
Canola or vegetable oil (for brushing baking pan)
1 ½ cups unbleached all-purpose flour
1 tsp. baking powder
½ tsp. table salt
1 ½ cups packed light brown sugar
2 large eggs, lightly beaten
4 tsp. vanilla extract
4 oz. white chocolate bar, chopped (pieces about ¼ to ½ inch)

1. Heat a small saucepan over medium heat. Add the butter and cook until the butter browns, stirring frequently. This doesn’t take long. Probably less than 5 minutes total. Transfer butter to a heat-proof glass measuring cup and allow to cool.

2. Preheat oven to 350 F with rack in middle position. Spread pecans on a baking sheet and roast until deep golden brown, about 15 minutes. Allow nuts to cool then chop coarsely. Set aside.

3. Prepare a 13 X 9 inch baking pan by lining it aluminum foil (you’ll need to use two sheets). Be sure to press the foil firmly into corners and allow a little to overhang the edges. Brush pan lightly with oil.

4. Whisk together flour, baking powder and salt in a large bowl. In a medium bowl, stir together cooled browned butter until combined. Add eggs and vanilla extract and stir until combined. Pour the mixture into the bowl with the dry ingredients and fold with a rubber spatula until just combined. Fold in the chopped white chocolate and pecans.

5. Transfer batter to the lined baking dish and smooth top with a spatula. Bake until top is shiny, cracked and light golden brown, about 22-25 minutes. Cool on a wire rack then remove from pan by lifting the foil overhang. Transfer to a cutting board and cut into squares.

Maple-Bacon Ice Cream
Adapted from Maple Ice Cream with Salty Buttered Nuts, Jeni Britton Bauer

¼ lb. thick sliced bacon
2 cups whole milk
1 tbsp. plus 1 tsp. cornstarch
3 tbsp. cream cheese, softened
½ tsp. salt
1 ¼ cups heavy cream
2 tbsp. light corn syrup
1 ½ cups pure maple syrup

1. Cook bacon in a frying pan over medium heat until crisp. Set aside to cool on paper towels. Chop into ¼-inch bits. Set aside until ready to use.

2. In a small bowl, whisk 2 tbsp. of milk with the cornstarch to make a slurry. Whisk the cream and salt together in a large bowl.

3. In a 4-quart saucepan over medium-high heat, bring the bring syrup to boil, reduce heat and continue boiling for 8 minutes until the syrup has reduced by half and has begun to darken around the edges. Remove from heat. Stirring constantly, add the cream, corn syrup and the remaining milk. Bring the mixture to boil over medium-high heat. Reduce heat and continue boiling for 4 minutes, stirring constantly to prevent it from boiling over. Remove from heat and gradually whisk in the cornstarch slurry. Return the mixture to boil and cook 1 minute until thickened. Remove from heat.

4. Whisk the hot mixture into the large bowl with the cream cheese until the mixture is completely combined and smooth. Pour the mixture into a 1-gallon Ziploc bag and set the bag in a large bowl filled with ice water. Cool the mixture in the ice water bath for about 30 minutes, adding extra ice as necessary. Refrigerate until ready to process.

5. Pour mixture into an ice cream mixture and spin until thick and creamy (usually about 25 minutes, but may vary depending on the device). Fold in the crisped bacon and transfer to a container. Freeze until cold and hard, about 4 hours.

Smoky Whipped Cream

1 cup heavy whipping cream
1 tbsp. sugar
½ tsp. hickory smoke flavor
½ tsp. vanilla extract

Combined ingredients and pour into the bowl of a stand mixer with the whisk attachment. Turn mixer on and whip at low speed until bubbly, about 30 seconds. Increase speed to medium and whip until mixture is quite frothy, another 30 seconds. Increase speed to high and whip until cream is thick and stiff, about 30 seconds to a minute longer (be careful no to over whip). Mixture will keep cool in the fridge but will break down after about a day.

Friday, February 1, 2013

The Siberian


This came about because a coworker told me she and some girlfriends had enjoyed boozy milkshakes over the weekend. I thought that sounded really good. Although I realize alcoholic milkshakes are a cliché of some chain restaurant bars, I think if you make this at home with good-quality ice cream, you don't have to feel ashamed about it. My drink is modeled after the classic White Russian.

The Siberian

1 1/2 cups vanilla ice cream
1 oz. vanilla vodka
1 oz. Kahlua
1/2 oz. creme de cacao
1/2 cup whipped cream (see recipe below)
Dark chocolate chip (optional garnish)

Combine ice cream, vodka, Kahlua and creme de cacao in a blender. Blend until smooth. Poor into a highball glass. Top with whipped cream and a single chocolate chip.

Basic Whipped Cream

1 cup heavy cream
1 tbsp. sugar
1 tsp. vanilla

Combine ingredients in the bowl of a stand mixer with a whisk attachment. Whip for 30 second on low speed until bubbles appear. Increase speed to medium and whip for another 30 seconds until frothy. Increase speed to him and whip until whipped cream is stiff and holds its shape, 30 seconds to a minute longer (do not overwhip or you'll end up making butter).


Friday, December 28, 2012

Best of 2012: Dessert


This year, my dessert-making was guided by two principal influences: the creativity of Momofuku Milk Bar pastry chef Christina Tosi and the ice cream wizardry of Jeni Britton Bauer. Whether I was faithfully re-creating their recipes or inspired by their techniques to whip up an original creation, the results always hit the sweet spot.

From Tosi, I found a cookie so delicious it rivals my all-time favorite (peanut butter), the Corn Cookie, which is like the sweetest corn bread transformed into a cookie. I also enjoyed making her Crack Pie just the other week.

After making a few of Bauer’s ice creams last year, I felt free to apply her technique to come up with flavors of my own. A favorite from early in the year to coincide with my week of olive oil themed content was, naturally, Olive Oil Ice Cream with a dark chocolate sauce.

Then I mashed up ideas from both of these chefs for two recipes: A Blackberry-Vanilla Ice Cream Pie with Corn Cookie Crust, which combined a Bauer ice cream recipe with Tosi’s idea to grind up corn cookies and use them as ice cream pie crust. Even more adventurous was the Cereal Milk Baked Alaska, which used Tosi’s idea of using sugary kids’ cereal as flavoring in ice cream but made with Bauer’s technique, encased in an oven-browned meringue over brown butter cake.

A couple of my desserts got special recognition this year, which was very nice to experience. In the summer, my Chocolate Cake with Peanut Butter Frosting won my office dessert contest. And in the run-up to Thanksgiving, the New York Times Diner’s Journal included a mention of my Apple Pie with Vodka Crust, based on a recipe from America’s Test Kitchen.

I went a little cookie crazy a few weeks ago. Besides the Corn Cookies, I featured my long-time favorite, Peanut Butter, and the holidays wouldn’t be complete without these Old-Fashioned Sugar Cookies from an old Mary Engelbreit recipe.

Saturday, October 27, 2012

Reese's Pieces Ice Cream


E.T. - The Extra-Terrestrial is an incredibly good movie, and I'm celebrating its 30th anniversary with this Reese's Pieces Ice Cream, a nod to the peanut butter candy Elliott uses to coax E.T. out of the shed and into the house.

I've read the production originally sought to use M&Ms, but the candy company wouldn't allow it. So they turned to the similarly shaped Reese's Pieces which, in 1982, had only been on the market a few years. Since the movie went on to become a massive critical and commercial hit--it was a Best Picture nominee and the highest-grossing movie of all time in the U.S. for 15 years--this was surely a major boon to Hershey, maker of Reese's Pieces.


Unlike the pieces' better known cousin, Reese's Peanut Butter Cups, there is no chocolate in Reese's Pieces. They are just a sweet peanut butter filling coated with a hard candy shell that's either orange, brown or yellow.

This ice cream is really quite simple: I used Jeni Britton Bauer's basic recipe for vanilla bean ice cream and stirred in some Reese's Pieces I'd pulsed in the food processor a few times to break them up a bit. If you don't want to make ice cream, you could achieve a similar result by letting store-bought vanilla ice cream soften a bit and then stirring in the crushed candy.

Reese's Pieces Ice Cream
With credit to Jeni's Vanilla Bean Ice Cream, Food & Wine

2 cups whole milk
1 tbsp. plus 1 tsp. cornstarch
1 1/4 ounces cream cheese, softened
1/8 tsp. salt
1 vanilla bean pod
1 1/4 cups heavy cream
2/3 cup sugar
1 1/2 tbsp. corn syrup
3/4 cup Reese's Pieces

1. Mix two tablespoons of the milk together with the cornstarch in a small bowl. Whisk together cream cheese with salt in a large bowl. Fill a large bowl with ice water.

2. Split the vanilla bean pod in half the long way and scrape the seeds into a medium heavy saucepan. Add bean pod to pan along with remaining milk, cream, sugar and corn syrup. Bring mixture to boil and boil for 4 minutes, stirring to prevent it from boiling over. Remove from heat. Slowly whisk in the milk/cornstarch mixture. Return to heat and boil for 1 minute until mixture starts to thicken. Remove from heat and whisk into the cream cheese until combined and smooth. Pour mixture into 1-gallon Ziplock bag and submerge bag in the ice water bath, adding additional ice if necessary. Chill for 30 minutes. The mixture can now be refrigerated if needed.

3. Spin ice cream in ice cream maker according to manufacturer's directions. While spinning, pulse Reese's Pieces a few times in a food processor to break up. When ice cream is done, stir candy into ice cream until combined. Freeze completely in freezer.