Monday, September 30, 2013

BBQ Turkey Chili-Stew


What makes a chili? That's a question I'll be exploring this week, as I offer recipes for a variety of chilis, ranging from a bean-free traditional Texas chili, a popular midwestern variation and a mashup I created with Thai influences.

Generally, "chili" is used as shorthand for "chili con carne," a dish that originated in the 19th century frontier southwest, particularly Texas (for more chili history see Wikipedia or this article by Linda Stradley for What's Cooking in America). It consists primarily of stewed beef, chili peppers, onion and tomato. Whether it also includes beans is a major point of contention: some insist that authentic Texas chili con carne does not include beans. But a Google search of "chili con carne" recipes reveals plenty of results that do. So clearly this isn't a consensus issue.

Chili purists may balk at the volume of vegetables in this dish, hence the "chili-stew" moniker.

Because the chili recipe below strays pretty far from what would be considered authentic Texas chili, I'm calling it a "chili-stew." Although I often make chili with canned tomatoes, I wanted to take advantage of the ripe tomatoes available right now, which I roasted for this dish, an adaptation of the Turkey-Black Bean Chili I've written about previously. This version has even more vegetables, kidney beans instead of black and more of a barbecue sauce flavor profile. This is the one dish Chris asks for more than any other, and I agree it's quite satisfying any time of year.

BBQ Turkey Chili-Stew

2 lb. ripe tomatoes (for roasting)
1/4 lb. hickory-smoked bacon, cut into 1/4-inch strips
1 lb. ground turkey thigh
1 sweet onion, diced
1 red bell pepper, cored, seeded and diced
1 green bell pepper, cored, seeded and diced
2 carrots, peeled and diced
Seasoned salt, to taste
3 garlic cloves, smashed
6 oz. can tomato paste
Kernels cut off 1 ear of corn
28 oz. can of kidney beans
1/2 tsp. chipotle chili powder (or more if you want)
1/2 tsp. smoked paprika
1 tbsp. dried oregano
1 tbsp. ground cumin
1 tsp. liquid hickory smoke flavor
2 tbsp. brown sugar
2 tbsp. apple cider vinegar
2 tbsp. Worcestershire sauce
5-6 cups of water
Shredded jack cheese (optional topping)

1. To roast the tomatoes, preheat the oven to 350 F. Take 4 ripe tomatoes, quarter them, toss with 1 tbsp. of olive oil and a sprinkle of salt and roast for 2 1/2 hours, stirring every 30 minutes until shriveled, browned in places and most of the liquid has evaporated. Allow to cool and store in the fridge until ready to use.

2. Heat a cast-iron Dutch oven or large deep-sided sauté pan over medium heat. Add bacon and cook, stirring frequently until its fat has rendered and the bacon is brown and crisp. Remove bacon with a slotted spoon and set aside on a paper-towel-lined plate. Remove rendered bacon fat, leaving about 2 tbsp. in the pot. Add the turkey and cook, stirring frequently, until browned. Remove from pot. Add onion, red and green bell pepper and carrots to pot. Season with seasoned salt and cook, stirring frequently, until the vegetables soften. Add the garlic and continue cooking until the vegetables are quite soft and fragrant, even starting to brown, about 10 minutes total.

3. Add back to the pot the cooked bacon and turkey along with the tomato paste, corn, beans, chili powder, smoked paprika, dried oregano, ground cumin, smoke flavor, brown sugar, vinegar, Worcestershire sauce and water. Increase heat to bring to boil. Cover point, reduce heat and simmer over low meat (mixture should bubble gently) for 20 to 30 minutes, stirring occasionally. Remove from heat. Taste chili and adjust seasoning. Serve in bowls topped with shredded cheese.

Saturday, September 28, 2013

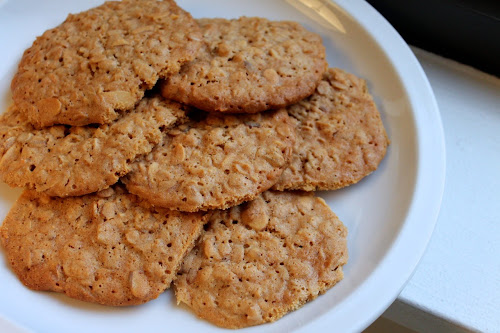
Honey-Nut Oatmeal Cookies

Honey-Nut Oatmeal Cookies

This was my first attempt at creating an original cookie. I drew inspiration from one of my favorite cereals, Honey-Nut Cheerios, and designed the recipe around its flavors. Although implied by the name, Honey-Nut Cheerios don't actually contain nuts anymore, although they used to have almonds. Since it's an oat cereal, these cookies are a riff on oatmeal cookies.

Designing your own cookie isn't that hard, but there are a few things to know. All cookies have six basic components:

  1. Fat (usually butter),
  2. Sugar (may be white, brown or both), 
  3. Flour (generally all-purpose, but some cookies have whole wheat, nut flours and a few, like monster cookies, omit it),
  4. Leavening (some combination of baking soda, baking powder or both),
  5. Flavors (here's where you get to be creative; some typical ones include chocolate chips, peanut butter, oats, ginger, cinnamon, etc.), and 
  6. Salt, which helps bring out the other flavors.

The proportions of those ingredients dictate what kind of cookie you'll end up with, whether its crunchy or soft, chewy or cakey, mounded or spread, for example. These cookies were mostly chewy with a bit of crunch and they spread nicely.

Honey-Nut Oatmeal Cookies

1 1/3 cups flour
1/4 cup ground almonds
1/2 tsp. baking powder
1/4 tsp. baking soda
1/2 tsp. salt
2 sticks (16 tbsp.) unsalted butter
1/2 cup sugar
1/2 cup brown sugar
3/4 cup honey
2 large eggs
3 cups old-fashioned oats
2/3 cup sliced almonds, pan toasted

1. Preheat oven to 350 F.

2. In a large bowl, whisk together flour, ground almonds, baking powder, baking soda and salt.

3. Add butter to the bowl of a stand mixer and beat until creamy. Add sugar and brown sugar and beat until fluffy, about 3 minutes. Beat in the honey, then beat in the eggs one at a time. Add the oats and sliced almonds and stir into the dough with a wooden spoon.

4. Scoop 2-tablespoon rounds of dough onto a baking sheet lined with silpat or parchment, spread about 2 inches apart. Bake 22-25 minutes, rotating baking sheets from top-to-bottom and front-to-bank about halfway through. Cool on baking sheet and then transfer to a plate or container. Store in the refrigerator.

Friday, September 27, 2013

Cocktail: Breaking Bad's The Heisenberg


Bon Appétit's article about the booze in Breaking Bad got me thinking about making a cocktail to honor the show, AMC's dramatic series about a high school chemistry teacher turned drug kingpin that concludes its 6-year run this weekend. Here then is The Heisenberg, named after Walter White's alter ego that has increasingly consumed the good man White once was.

As Bon Appétit points out, whiskey shows up during key scenes in the show, so I used Knob Creek rye as this drink's foundation and drew inspiration from the show's geography for the rest: habanero shrub, as a nod to the show's New Mexico setting; Becherovka, as a tip of the hat to the Czech Republic, where White's meth is a big seller; and maple syrup to represent New Hampshire, an important setting near the end of the show. Even the lime wheel is an ode to the show's distinctive green logo.

Breaking Bad's The Heisenberg Cocktail

1 1/4 oz. Knob Creek Rye Whiskey
1/2 oz. Becherovka liqueur
1/2 oz. Maple syrup
1 dropper Bittermens Hellfire habanero shrub
1/2 oz. fresh lime juice
Lime wheel

Combine whiskey, Becherovka, maple syrup, bitter and lime juice in a shaker with ice. Shake until cold. Strain into a rocks glass with ice. Garnish with lime wheel.

Thursday, September 26, 2013

Panna Cotta with Blueberries


I had disappointing panna cotta in a restaurant recently, which got me thinking about whether it's difficult to make it right. I've had it before and it's been great: a simple custard-like dessert that's just set enough to be thick but still very creaming. The panna cotta I had that I didn't like was too rubbery, instead of the light texture I've had before at other restaurants. What's the trick to getting it right?

Of course, for questions on what makes classic recipes turn out well, I turned to one of my favorite cooking resources: America's Test Kitchen. They suggest the right balance of milk and cream is important, as is the amount of gelatin. Too much and you get rubber.

My panna cotta had great texture: just enough structure that it wasn't runny but not at all rubbery. You'll notice in the photo above a bit of cream pooled around the edges. I think I didn't chill it long enough. The panna cotta we ate the second day (and thus chilled overnight) was a little firmer.

Panna Cotta with Blueberries
Adapted from Classic Panna Cotta by America's Test Kitchen

Serves 4

1/2 cup whole milk
1 1/4 tsp. powdered gelatin
1 1/2 cups heavy cream
2-inch piece of vanilla bean, slit lengthwise with a paring knife
3 tbsp. sugar
Pinch of salt
Simple blueberry sauce (see recipe below)

1. Pour milk into a medium saucepan and sprinkle with the gelatin. Let sit for 10 minutes.

2. Prepare an ice bath in a large bowl with about 32 ice cubes and 4 cups of cold water.

3. Add cream to a liquid measuring cup. Using a paring knife, scrape the seeds from the vanilla bean into the cream, then add the bean pod to the cream as well.

4. Heat milk and gelatin mixture over medium-high heat, stirring constantly until the gelatin is dissolved and the mixture reaches a temperature of 135 F. Remove from heat, add sugar and salt and stir until dissolved.

5. While constantly stirring milk mixture, slowly pour the cream and vanilla into the saucepan, then pour the mixture into a medium bowl and set it over the ice bath. Stir frequently until thickened and mixture registers 50 F with an instant-read thermometer, about 10 minutes.

6. Strain mixture into a large liquid measuring cup and then portion out equally among four ramekins. Place ramekins on a baking sheet and cover sheet and ramekins with plastic wrap (make sure plastic does not touch the top of the custards). Refrigerate until just set, at least 4 hours. The mixture should wobbly gently.

7. After being chilled, unmold panna cotta from the ramekins by dipping each ramekin in a small bowl of boiling water for 3 seconds, running a moistened finger around the edge of the custard to gently pull it away from the side of the ramekin, then inverting the custard over your hand and gently easing it onto a plate (alternatively, in step 6, pour into wine glasses instead of ramekins and serve in the glasses without unmolding).

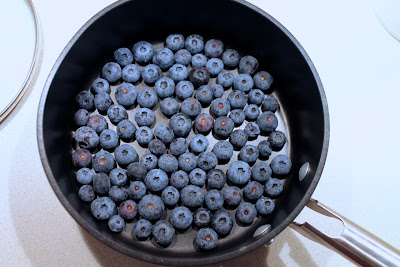
Blueberries

Simple Blueberry Sauce
Adapted from Sweet Savory Life

1 cup of blueberries
1/2 cup sugar
1/4 cup water

Combine blueberries, sugar and water in a medium saucepan over medium-heat. After the mixture boils, cook for 10 minutes, stirring occasionally until the mixture has thickened. Allow to cool. Transfer to a glass container and store in the refrigerator.

Wednesday, September 25, 2013

The Feed: September 25, 2013

The Feed is my weekly round up of interesting food-related stories from newspapers, magazines, blogs and websites.

Bon Appétit: “The Whiskey of 'Breaking Bad,' from Knob Creek to Dimple Pinch,” by Jordana Rothman.
This Sunday, Breaking Bad, one of my favorite television shows will conclude its 6-year run. Definitely a moment that deserves a stiff drink, especially given the very dark (very very dark) way the show is wrapping up. Rothman examines how whiskey turns up frequently in the show, generally during pivotal moments. In contrast, tequila, when it appears, usually spells doom. Great stuff for very observant boozehound viewers of AMC’s amazing series.

Details: “Fall Whiskey Trend Alert: Maple Is the New Honey,” by Camper English.
English, writer of Alcademics.com, talks about this year’s whiskey flavor trend: maple. I have to say, I’m generally not a fan of flavored liquors. I’d rather mix the flavors myself with liqueurs, syrups and infusions. But I just might be tempted to try Knob Creek’s Smoked Maple whiskey. Sounds like a great way to warm up on a cold winter day.

DC Eater: “Seasonal Sips: Bartenders' Fave Fall Ingredients.”
Time to put away the tomato water and break out the baking spices, apple brandy, sweet vermouth and pumpkin—just a few of the flavors D.C. bartenders are using in their new fall-themed drinks.

Washington Post: “Why farmed salmon is becoming a viable alternative to wild-caught,” by Tamar Haspel.
When it comes to buying salmon, I know that wild is supposed to be “better,” but in DC, it tends to be way more expensive. And frankly, it’s not necessarily better tasting. I’ve been content to enjoy the farmed variety from Whole Foods for many years. It’s nice to see that “farmed” isn’t such a bad word anymore in the salmon world, as awareness of bad practices has led to improvements to address many of them. Haspel, who wrote the pig-raising series for the Post last year that I found so compelling, does a typically great job of exploring the issue. There’s also a related tasting story where, surprise, testers found they preferred the taste of farmed salmon too.

Wall Street Journal: “How to Make Beurre Composé,” by Gail Monaghan.
You might not think a story about flavoring butter would be very interesting, but I found Monaghan’s story about “buerre composé” (a.k.a. “compound butter”) to be a great look at how mix-ins like herbs, garlic and anchovies can elevate creamy, luscious butter to an even higher plane.

Wall Street Journal: “Vanilla Beans That Are Anything but Plain Vanilla,” by Elizabeth Gunnison Dunn.
“Vanilla” is metaphorically synonymous with “plain” and “boring,” which is a real shame, since, as cooks know, vanilla is anything but. In its original bean form, it exhibits complex even overpowering flavor. While ideal for desserts, vanilla has some savory applications too, which Dunn explores courtesy of advice from Empellon Chef Alex Stupak. I really appreciated the sidebar explanation of the different flavors of various types of vanilla bean.

New York Times: “Panzanella With Chicken and Capers,” by Melissa Clark.
While tomatoes are in season, we eat a ridiculous amount of panzanella. In fact, we have it almost every Sunday night from late July through late September. It’s just so good right now. I have a standard recipe, although sometimes I mix it up a bit (like this roasted tomato version). Although I usually make mine vegetarian, I enjoyed this take by Clark that includes roasted chicken, crispy chicken skin and capers.

New York Times: “Breaded and Fried Cutlets Can’t Miss,” by David Tanis.
Breaded, fried meat cutlets are an easy and satisfying preparation. Tanis talks about why and offers tips for doing it well.

The Boys Club: “Liquor Pronunciation Guide,” by Greg Mays.
Don’t you just hate it when you want to order something off the menu but you’re not sure how to pronounce it? It makes you feel like such a rube. Same is true at the bar or the liquor store. Wouldn’t you rather been the person looking to buy Cynar that asks for “CHEE-nar” instead of “SIE-nar”? This guide will help you sound sophisticated next time you’re in the market for Dambule (dram-BEU-ie) or Angostura (AN-go-STOOR-a). You’re on your own though if you want Curaçao, although I’m pretty sure you shouldn’t sound like you’re a bovine doctor.

Tuesday, September 24, 2013

Cereal Milk Ice Cream Pie with Compost Cookie Crust

Cereal (Lucky Charms) Milk Ice Cream Pie with Compost Cookie Crust

Yesterday I wrote about Compost Cookies and teased an even more epic dessert they were to be incorporated into. Here it is: Lucky Charms Ice Cream Pie with Compost Cookie Crust. Enough sweetness for you?


Separate the marshmallows from the oat shapes, then pulse the oats a bit in a food processor.

Like Compost Cookies, Cereal Milk Ice Cream is the creation of Momofuku pastry chef Christina Tosi. The basic principle is to saturate milk with the flavor of cereal--like the dregs in your bowl--then use that to make ice cream. For a baked Alaska last summer, I used Cinnamon Toast Crunch. For this pie, I decided to give Lucky Charms a try.

Because the marshmallow colors tend to run together and form a greenish-gray color, I picked the marshmallows out first, with the intention of stirring them back into the ice cream at the end. The remaining oat cereal pieces are surprisingly (or perhaps not, depending on your outlook of the cereal industry) sweet on their own, giving the ice cream a nice oat-sweet flavor.


Four Compost Cookies were exactly the amount I needed to make this pie crust.

For the Compost Cookie crust, I first baked the cookies and then pulverized them with a little more added butter to form a cookie crust for the pie. In making the cookies, I deviated from Tosi's recipe by using graham cracker crumbs instead of her custom graham crust, which is a separate preparation of its own. Given all the flavors already going on in this dessert, I didn't miss it. The recipe from yesterday makes more than enough cookies for crust recipe; count yourself lucky that by making this you'll also get to enjoy a few compost cookies. They are amazing.

Perhaps the best part of making this dessert was that I got to showcase it alongside a group of coworkers' delicious creations in a Momofuku Milk Bar-themed afternoon dessert extravaganza. We all had sugar highs (and subsequent crashes) after that, but it was worth it.

Momofuku-themed desserts.


Cereal Milk Ice Cream Pie with Compost Cookie Crust
Inspired by and incorporating adapted recipes from Christina Tosi of Momofuku Milk Bar

250 grams (i.e. about 8 ounces or 1/2 pound) of Compost Cookies, about 3-4 large cookies
4 tbsp unsalted butter, melted
1 recipe cereal milk ice cream (see below), softened a bit if frozen hard

1. Process cookies in food processor until ground to a fine crumb. Combine crumb in bowl with melted butter. Press evenly on bottom and sides of a standard pie plate. Refrigerate until ready to use.

2. Transfer the ice cream into the pie shell in an even layer.

3. Freeze pie. Let set out about 15 minutes before cutting and serving.


Cereal Milk Ice Cream

Inspired by Cereal Milk Ice Cream, Momofuku Milk Bar

4 cups Lucky Charms cereal
4 cups whole milk
1 1/4 cups heavy cream
1/2 cup sugar
1/8 tsp. salt
5 egg yolks

1. Separate Lucky Charms' marshmallows and oat shapes. Set the marshmallows aside. Pulse oat shapes a few times in a food processor to break them up a bit. In a large (4 qt.) saucepan, heat milk and cereal over medium heat until the mixture starts to bubble. Remove from heat and allow to "steep" for about 30 minutes. Strain cereal mixture, pressing with a spatula to get out as much milk as possible, to yield about 2 cups (add extra whole milk if you end up with less than 2 cups).

2. Add cereal milk, heavy cream, sugar and salt to a large (4 qt.) saucepan over medium-high heat. Cook, stirring frequently, until the mixture reaches a temperature of 165 F.

3. Meanwhile, in a small bowl, whisk together egg yolks. Whisk in about 1/2 cup of the warm cream mixture to temper the eggs, then whisk the egg mixture into the warm mixture in the saucepan. Continue cooking, whisking constantly, until the mixture reaches 180 F.  Transfer mixture to a large (1 gallon) resealable bag. Submerge in an ice water bath for about 10 minutes then chill in the refrigerator until cold.

4. Process in an ice cream maker following maker's instructions. Once finished, transfer ice cream to a container and carefully stir in the marshmallows (don't over-stir or their color will run). Put in freezer and freeze until ready to use for the pie.

Monday, September 23, 2013

Compost Cookies

Compost cookies

Who's up for a week of sweet treats? About this time of year, after weeks of lots and lots of wonderful, fresh seasonal vegetables, I'm usually in the mood for a gear-shift. I've got three great dessert recipes to share with you this week.

First up: compost cookies, one of the famous sweet concoctions from the New York pastry shop chain Momofuku Milk Bar, an offshoot of David Chang's restaurant empire overseen by pastry chef Christina Tosi, one of my personal dessert icons.

Pretzels are one of the salty mix-ins in Compost Cookies.

Compost cookies are a fun idea: mix together a bunch of snacks and sweet bits into one delicious cookie. There are lots of possibilities. I followed Tosi's recipe, which includes pretzels, potato chips and chocolate and butterscotch chips. It's a sweet-and-salty combination that works wonderfully.


While these cookies are magnificent on their own, I actually made them to incorporate as an ingredient in a rather epic dessert. Curious? Come back tomorrow to find out what it is.


Compost Cookies
Adapted from a recipe by Christina Tosi for Momofuku Milk Bar

Note: Tosi's recipe in the link above helpfully includes weight and volume measures for the ingredients. I include the weight measures for larger-quantity ingredients below but not the smaller ones, as I find my kitchen scale too imprecise to make weight measure below tablespoon or so.

2 sticks (16 tbsp.) unsalted butter, at room temperature
1 cup (200 g) sugar
2⁄3 cup (150 g) tightly packed light brown sugar
1 tbsp. corn syrup
1 large egg
1/2 tsp. vanilla extract
1 1⁄3 cups (225 g) all-purpose flour
1/2 tsp. baking powder
1/4 tsp. baking soda
1 tsp. kosher salt
3/4 cup (150 g) mini chocolate chips
1/2 cup (100 g) mini butterscotch chips (unable to find mini chips, I used regular size, which worked fine)
1/2 cup graham cracker crumbs
1⁄3 cup (40 g) old-fashioned rolled oats
2 1/2 tsp. ground coffee (I used Peet's Major Dickason blend, which is our usual morning coffee)
2 cups (50 g) potato chips (per Tosi's suggestion, I used Cape Cod chips
1 cup (50 g) pretzel sticks, pulsed in a food processor a few times to break up

1. Combine the butter, sugars, and corn syrup in the bowl of a stand mixer fitted with the paddle attachment and beat on medium-high speed for 2 to 3 minutes. scrape down the sides of the bowl, add the egg and vanilla, and beat for 7 to 8 minutes.

2. Reduce speed to low, then add flour, baking powder, baking soda, and salt. mix until the dough just comes together, no longer than a minute. Scrape down the sides of the bowl with a spatula.

3. Add the chocolate chips, butterscotch chips, graham cracker crumbs, oats, and coffee and mix on low speed until just incorporated, about 30 seconds. Add the potato chips and pretzels and mix on low speed until just incorporated.

4. Portion out the dough in 1/3 cup rounds onto a parchment- or silpat-lined baking sheets, leaving about 2-3 inches between cookies. Pat the tops of the cookie dough domes flat. wrap the baking sheets in plastic wrap and refrigerate for at least 1 hour, up to 1 week. (Cookies must be chilled to bake properly).

5. Preheat oven to 375 F. Bake cookies for 18 minutes, at which time they should be spread and puffed, cracked on top and be faintly brown around the edges. Bake longer if necessary. Remove from oven and cool cookies completely on baking sheets before transferring to a plate or air-tight container. Store in the refrigerator, but allow them to warm to room temperature before serving.

Friday, September 20, 2013

Cocktail: Green G&T


I call this the "green" G&T, since its three plant components: cucumber, lime and mint, are green both in color and in their refreshing flavors. Toss them together, you have a perfect cocktail for sipping outside on a nice day.

Green G&T

3 peeled cucumber slices
4 mint leaves
Lime wedge
1 1/2 oz. American dry gin (Dry Fly)
1 juniper berry
3-4 oz. tonic water
Cucumber slice and mint leaves for garnish (optional)

Combine cucumber slices and mint leaves in a lowball glass. Squeeze the lime juice over the cucumber and mint and muddle. Drop the lime wedge into the glass. Add ice, gin, juniper berry and tonic water. Stir to combine. Garnish with a cucumber slices and a few mint leaves.

Thursday, September 19, 2013

Fresh Tomato and Oregano Soup


Searching for a interesting tomato soup recipe, I came across this Chunky Fresh Tomato Oregano Soup on the site Rock Recipes, a food blog out of Newfoundland, Canada. I like this soup for its simplicity and bold, fresh tomato flavors. It comes together in less than an hour with pretty minimal effort.

I changed a couple things from the original recipe: I omitted the vegetable broth and used water, since I did not want to dilute the pure tomato flavor. Yes there is oregano here, but that only enhances the tomato taste. I also cut back on the olive oil and butter, which was original 3 tablespoons each.

Fresh Tomato and Oregano Soup
Adapted from Chunky Fresh Tomato Oregano Soup, Rock Recipes

Makes about 4 servings

1 tbsp. unsalted butter
1 tbsp. extra-virgin olive oil
1 sweet onion, diced
6 garlic cloves, minced
2 1/2 to 3 lbs. fresh tomatoes, diced
1/2 cup chopped fresh oregano leaves
3 bay leaves
1 tsp ground fennel seeds
1/2 tsp crushed red chili pepper flakes
3 cups water
Pinch of brown sugar
Parmesan toast rounds (optional garnish, recipe below)

1. Combine butter, olive oil and onion in a Dutch oven or other large soup pot over medium heat. Cook until the onions soften, about 5 minutes. Add the garlic and cook another 2 to 3 minutes until fragrant. Onions should be very soft but not brown (reduce heat if needed to prevent browning).

2. Add the remaining ingredients through brown sugar, increase heat to boil, reduce heat and simmer for 30 to 40 minutes.

3. Remove the bay leaves. Pulse an immersion blender through the soup a few times to make it thicker, but do not process to a puree (the soup should be chunky). Serve garnished with a sprinkle of fresh oregano leaves and a parmesan toast round (recipe below).

Parmesan Toast Rounds

4 slices of baguette, about 1/2-inch thick
Olive oil
Grated parmigiano-reggiano cheese
Hungarian paprika

Preheat oven broiler. Lightly brush baguette slices with olive oil. Transfer to a baking sheet and broil until lightly browned (watch carefully, they will burn fast). Turn bread slices over to toast the other side. Remove from oven and place a heaping spoonful of parmesan on each toasted slice. Sprinkle with paprika. Return to broiler to melt cheese (again, watch carefully to prevent the cheese from burning). Remove from oven

Wednesday, September 18, 2013

The Feed: September 18, 2013

The Feed is my weekly round up of interesting food-related stories from newspapers, magazines, blogs and websites.

Eater: “Windows on the World, New York's Sky-High Restaurant,” by Greg Morabito.
Much was taken away from us on September 11, 2001. One of those things was Windows on the World, the restaurant at the top of One World Trade Center, which, along with 79 of its employees, was lost that day. Morabito’s story, a 12th anniversary of 9/11 feature, is a wonderful tribute to the once top-of-the-world restaurant. In addition to discussing its history and design, he also interviews its final chef, Michael Lomonaco.

Washington Post: “Revive wilted produce to fight food waste,” by Carol Blymire.
Blymire’s opening anecdote is a common one for the home cook: at some point in the week you pull out your fridge’s vegetable drawer full of wonderful farmers market produce and find…that it’s not so wonderful anymore. It’s droopy and limp. Maybe okay for a soup or stir fry, but a salad? Uh-uh. She does a great job explaining how moisture loss is the culprit, offers tips to prevent it and explains how to revive vegetables with water once they’ve started going over the edge (too far gone though and they should just be discarded). Handily, she offers specific tips for reviving 12 produce items.

Serious Eats: “The Serious Eats Guide to Ramen Styles,” by J. Kenji López-Alt.
If Bon Appétit’s Beginner’s Guide to Ramen whetted your appetite, this should really satisfy your thirst for ramen knowledge. It’s amazingly comprehensive, covering different types of styles, broth bases, seasonings, noodles, meats, eggs, vegetables and more. And if that’s not enough, this is just part of a week’s worth of ramen coverage. Go noodle yourself!

New York Times: “Miso, for So Much More Than Just Soup,” by Martha Rose Shulman.
I have a tub of miso in my fridge that I bought for a few recipes in the spring (ramen, salmon, risotto and soup) and haven’t done much with since. If it’s still good (miso has a long shelf life, I think), then this Miso-Glazed Eggplant sounds like a perfect use for the Asian fermented bean paste. Shulman offers up several other miso recipes, none of the them soups.

Wall Street Journal: “Chinese Food Goes Upscale,” by Katy McLaughlin.
McLaughlin tackles an interesting question in this piece: with lots of Asian cuisines having gone “upscale” lately, why do so many Chinese restaurants seem stuck in the past? (“General Tso’s chicken and fortune cookies” as she puts it). Things may be changing though, as she chronicles several promising new openings across the country.

USA Today: “10 food fads worth traveling for,” by Christine Sarkis.
By now, everyone’s heard of the cronut. And the ramen and umami burgers are certainly making the rounds. Sarkis rounds up a collection of many of the most prominent trendy food trends and shares where you can get them.

The Amateur Gourmet: “Alphabet Of Foods That Will Kill You,” by Adam Roberts.
Food blogger Adam Roberts put out what amounts to a six-page comic book that covers deadly foods from A to Z. It’s mostly tongue-in-cheek, although arguably there are a few fatal things on the list.

Tuesday, September 17, 2013

This Ain't Your Baby's Applesauce

Deluxe Applesauce with Bacon, Caramelized Onion, Walnuts and Maple

Apples are usually associated with dessert: apple pie, apple cake, apple brown betty, etc. Savory apple recipes are few and far between. This time of year though, when apples come into their peak season, this most classic fruit deserves some space on your menu prior to the final course. Applesauce is one such avenue, a deliciously tart, spicy and sweet side that is particularly wonderful with pork but can serve alongside other mains as well.

It's also really easy to make. Of the many things you both buy and make yourself, the one I believe benefits most from the home cook's touch is applesauce. The kind in a jar just isn't very interesting. It has no texture and only a very basic flavor. It's hardly different from the baby-food version.

Hickory-Smoked Bacon
I used the intensely flavorful hickory-smoked bacon from Harvey's Market in D.C.'s Union Market.

No one would confuse this applesauce for baby-food. With added flavors and textures, this recipe turns the classic apple side into something that can really hold its own against a perfectly pan-seared pork chop.

I added bacon for smoky and crisp-chewy texture, walnuts for crunch, caramelized onion for depth and maple syrup for a more interesting sweetness than the usual white sugar. There's a bit of pepper and thyme as well, plus some lemon juice at the finish for a slight sourness. The resulting sauce is thick and chunky, sweet but not overly so. It's familiar as applesauce, but surprisingly different as well.

Caramelized Onion
Don't rush the caramelizing of the onions or you'll end up just sautéing them, which is a different process.

Deluxe Applesauce with Bacon, Caramelized Onion, Walnuts and Maple

1/4 lb. hickory-smoked bacon, cut into 1/4-inch strips
1 sweet onion, peeled and thinly sliced
Pinch of salt
Freshly ground black pepper, to taste
5 Granny Smith apples, peeled, cored and chopped into 1/2-inch cubes
1 tsp. ground cinnamon
1/4 cup water
1/2 tsp. dried thyme
1/4 cup chopped walnuts
2 tbsp. maple syrup
1 tbsp. fresh lemon juice

1. Add bacon to a medium saucepan over medium heat. Cook until browned and crisp; remove with a slotted spoon and set aside on a paper-towel-lined plate. Remove excess bacon fat to leave about a tablespoon. Reduce heat below medium; add onion and a pinch of salt. Cook, stirring occasionally until the onion is very soft and light brown (this is when it's caramelized), about 30 minutes. Season to taste with freshly ground black pepper.

2. Add apples, cinnamon, water, thyme, walnuts and maple syrup to saucepan. Increase heat to medium-high, cover and bring to a boil. When mixture boils, reduce heat to medium and simmer vigorously for about 15 to 20 minutes, stirring occasionally, until the apples are softened. Smash a few of the apple pieces with a wooden spoon as you stir the mixture, which will be very thick. Remove from heat and stir in the cooked bacon and lemon juice. Allow to cool a bit before serving (but I recommend serving it warm and not cold, but just not piping hot).

Monday, September 16, 2013

Cold Chickpea-Tahini Soup

Cold Chickpea-Tahini Soup

Summer's days are numbered, but that doesn't necessarily mean there won't still be some hot days to come. And fresh summer produce is still around: the tomatoes at my local farmers market continue to be fabulous.

Mix together the vegetable topping separately. Kind of looks like a chunky salsa.

If you find yourself with a hot day and an abundance of fresh vegetables, this cold chickpea soup, which ran in the New York Times in the spring, is just perfect. It comes together quickly too.

Using a blender makes this soup come together super fast.

I didn't change a lot from Mark Bittman's original recipe, although I did omit the crumbled feta cheese, which actually makes this soup vegan. I also left out the chopped olives, since I thought they might make it too salty. If you enjoyed the Parsnip-Carrot Soup with Tahini and Roasted Chickpeas from last winter, consider this a simpler, warmer weather cousin of that delicious dish.

The soup will be thick but should still be pourable.

Cold Chickpea-Tahini Soup
Adapted from a recipe by Mark Bittman for the New York Times

1 cup diced fresh tomatoes
1 cup diced cucumber
1/4 cup minced onion (I used sweet onion, the original recipe called for red)
1/4 cup chopped Italian (flat-leaf) parsley
Salt and freshly ground black pepper
3 cups (2 15 oz. cans) chickpeas, drained and rinsed
3 tbsp. fresh lemon juice
1 tbsp. extra-virgin olive oil, plus more for drizzling
1/4 tsp. ground cumin
1 small garlic clove
2 to 3 tbsp. tahini
1-2 cups of water

1. Combine tomatoes, cucumber, onion, parsley and a sprinkle of salt and pepper in a small bowl.

2. In a blender, combine the chickpeas, lemon juice, 1 tbsp. olive oil, cumin, garlic, tahini and a sprinkle of salt and pepper. Turn the blender on and, through the feed tube, gradually add enough water until the mixture is pureed with a smooth texture and is thin enough to pour (you will need at least 1 cup of water).

3. Pour into bowls and top with the vegetable mixture and a drizzle of good olive oil.

Friday, September 13, 2013

Roasted Tomato Cocktails

Smokin' Hot Tomato Cocktail

Someone recently asked me what my favorite vegetable was, and I said it has to be the tomato. It's amazingly complex, versatile and around for only a short time (except for canned of course). That time is now.

It's possible, however improbable, that you may be suffering from tomato overload at the moment. You're capresed and pazanelled out! If that's that case, here's an interesting twist for fresh summer tomatoes: make cocktails with them. And I'm not talking about tomato juice, but a homemade roasted tomato simple syrup. Now that's a way to drink a tomato.

The syrup is pretty simple (no pun intended): roast the tomatoes for a long time just like you would for a recipe. Pulse a few times in a food processor then boil with sugar and water. Let it infuse a bit and then strain with a mesh sieve. The resulting syrup is sweet with a nice roasted tomato flavor. And don't even think of discarding the solids. It's almost like a tomato jam, and is great on toast.

First I paired the tomato syrup with margarita ingredients, although in keeping with the roasted theme I went with smoky mezcal and a little fiery habanero shrub for kick. Then I mixed it with some moonshine--a legal version, that is: Midnight Moon moonshine, made in North Carolina.

Smokin' Hot Tomato
(pictured at top)

1 oz. mezcal
1/2 oz. orange cognac liqueur (such as Grand Marnier)
1 oz. roasted tomato simple syrup (see recipe below)
1/2 oz. fresh lime juice
2 droppers of Bittermens hellfire habanero shrub
Lime wheel garnish (optional)

Combine mezcal, orange liqueur, tomato syrup, lime juice and habanero shrub in a shaker with ice. Shake until cold and strain into a lowball glass with ice. Garnish with lime wheel.
Tomato at Night Cocktail
Tomato at Night

Tomato at Night

1 oz. Midnight Moon moonshine (may substitute vodka or gin)
1/2 oz. Aperol
3/4 oz roasted tomato simple syrup (see recipe below)
1/4 oz. fresh lemon juice
2 dashes angostura bitters
2 oz. club soda
Lemon wheel garnish (optional)

Combine moonshine, Aperol, tomato syrup, lemon juice and bitters in a shaker with ice. Shake until cold and strain into a lowball glass with ice. Add club soda and stir to combine. Garnish with lemon wheel.

Roasted Tomato Simple Syrup

2 lb. ripe tomatoes, quartered
Olive oil, about 1-2 tbsp.
Pinch of salt
1 cup water
1 cup sugar
1 tbsp. vodka (optional)

1. Preheat oven to 350 F. Place tomatoes in a 9 X 13 baking dish, drizzle with olive oil and sprinkle with salt. Roast for 2 to 2 1/2 hours, stirring every half hour or so until the tomatoes are shriveled, lightly browned and most of the liquid has evaporated. Transfer tomatoes to a food processor and pulse 5 or 6 times.

2. Heat a medium saucepan over medium-high heat. Add tomatoes, water and sugar and bring to a boil, stirring to dissolve sugar. Remove from heat and allow to "steep" for 20 minutes. Strain out the solids with a fine mesh sieve (the solids are tasty, like tomato jam). Once cooled, store the syrup in the refrigerator. To prolong its life, add 1 tbsp. vodka.

Thursday, September 12, 2013

Pasta with Broccoli Rabe and Anchovies

Pasta with Broccoli Rabe and Anchovies

My coworker Susan sometimes makes a pasta similar to this: simple and satisfying with fresh ingredients and a sprinkle of toast fresh bread crumbs for a little crunch.

Toasted fresh bread crumbs
If you have a few small tomatoes, such as sungold grape tomatoes, they would be great in this pasta too.

Broccoli rabe or rapini
Broccoli rabe, also called rapini

Broccoli rabe, if you're unfamiliar with it, is a green with small heads that resemble broccoli. A member of the mustard family, it's also often called "rapini." Don't confuse it with broccolini, which is a hybrid of broccoli with with smaller florets and longer, thin stalks.

Garlic, anchovies and red pepper flakes
Frying garlic, anchovies and red pepper flakes
I've said this before about anchovies, but I'll say it again: don't be afraid of them. They won't make this dish taste fishy. Honestly. They provide a nice meaty undertone that mingles well with the garlic and other flavors. They can really give a simple dish like this a nice flavor boost.

Pasta with Broccoli Rabe and Anchovies
Adapted from Gemelli with Broccoli Rabe and Anchovies, Epicurious

Makes 6 servings

3 slices good-quality white bread, such as sourdough or Italian
1 lb. pasta
Salt, to taste
1 lb. broccoli rabe, tough stems removed, leaves coarsely chopped
1/4 cup extra-virgin olive oil
5-6 garlic cloves, coarsely chopped
6 anchovy fillets, rinsed of salt and chopped
Pinch of red chili pepper flakes
Parmigiano-Reggiano cheese, shaved with a vegetable peeler

1. Trim the crusts off the bread and tear into pieces about 1-inch wide. Place bread in a food processor and pulse a few times until a desired crumb is achieved. Transfer crumbs to a medium frying pan over medium heat. Cook, stirring occasionally, until the bread dries out and browns a bit, about 15 minutes. Transfer to a bowl.

2. Bring a large pot of salted water to boil. Add pasta and cook about 5 minutes. Add broccoli rabe and cook another 5 minutes until the pasta is al dente and the broccoli rabe is tender (adjust initial pasta cooking time depending on how long the pasta should cook to allow broccoli rabe to cook for 5 minutes). Reserve 1/2 cup of pasta cooking water and drain the rest. Return pasta and broccoli rabe to the empty cooking pot.

3. Heat olive oil in a medium frying pan over medium-low to medium heat. When hot, add garlic, anchovies and red pepper flakes, stirring with a spoon to break up the anchovies. Cook for about 3 minutes, watching carefully to prevent garlic from browning (it should be golden, but not brown, which will make it bitter). Pour mixture over pasta, add reserved pasta water and stir to combine. Serve pasta in shallow bowls topped with parmesan shavings and toasted bread crumbs.

Wednesday, September 11, 2013

The Feed: September 11, 2013

The Feed is my weekly round up of interesting food-related stories from newspapers, magazines, blogs and websites.

Washington Post: “World’s Best Lasagna tops AllRecipes list for more than a decade,” by Caitlin Dewey.
If you’ve ever searched the web for a recipe, chances are you’ve come across AllRecipes.com in your results. According to Dewey’s article, it’s the most popular English-language food site. This is a great story not just about the website but also home cook John Chandler, who authored the site’s longtime most popular recipe: World’s Best Lasagna. Kudos to the Post for including not just Chandler’s recipe, but five other lasagna recipes too, including Mushroom Bolognese Lasagna, which sounds really good.

Washington Post: “India pale lagers, craft beer’s category straddlers,” by Greg Kitsock.
I’m generally not into lagers. I love my IPA—the hoppier, the better. But I’m intrigued by India Pale Lagers, a class of lagers hopped with the more aggressive Pacific Northwest hops usually reserved for ale. Kitsock writes about how these “IPLs” are proliferating in popularity, including several locally made (local to the D.C. area) examples.

Los Angeles Times: “Apples, apples everywhere -- 16 recipes and not one pie or tart,” by Russ Parsons.
With apple season arriving, I'm in the mood for some great apple dishes. But I grow tired of the fruit being treated as only dessert, so I was excited to see this great collection of apple recipes in the Los Angeles Times. Apple and fennel salad is a combination I really like (although there’s no credit, I think this is Jose Andres’s recipe from Jaleo—the manchego is the tip off). And the Apple-Bacon Coffee Cake with apples sounds really amazing.

FooDCrave: “Kapnos - A new Isabella delight on 14th Street,” by Amanda Liz.
Mike Isabella’s latest D.C. restaurant, Kapnos, a Greek outpost with a love of smoky flavors, got a great review from the Washington Post last week. Here’s another positive review, from the FooDCrave blog, which gives a wonderful plate-by-plate overview with pictures, and everything sound (and looks) delicious.

Refinery 29: “Make the Spiciest Margarita Ever,” by Gabriel Bell
My mouth started watering as read this piece, a collaboration with Jeanine Donofrio of the Love & Lemons blog. Spicy margaritas are hot!

New York Times: “City Kitchen: The Time Is Right for Lobster,” by David Tanis.
The price of lobster is down this year, due to an abundant crop. Tanis writes about seizing this opportunity to make lobster at home and offers a great recipe for pasta with lobster and fresh tomatoes.

Jim Romenesko.Com: “No Disguise for Baltimore Sun Restaurant Critic When He Talks to Chefs at Sun U.,” by Jim Romenesko.
The Washington Post’s restaurant critic, Tom Sietsema, is known for keeping his identity under wraps, never allowing himself to be photographed and even wearing disguises when he reviews restaurants—a time-honored tradition that former New York Times critic Ruth Reichl wrote about compellingly in her memoir, Garlic and Sapphires. Apparently, the Baltimore Sun restaurant critic, Richard Gorelick, does not share in this practice. Although he’s taken some steps to protect his identity, he will make public appearances and won’t wear disguises. It reminded me of Washington City Paper food writer Jessica Sidman’s introductory column from last year, in which she declared that she was not “anonymous,” since she didn’t think it necessary in today’s age, given the changing role of the restaurant writer. It’s an interesting change in the profession. As a blogger who writes about restaurants, I’ve recently thought about it for my own writing. While I don’t go tweeting to restaurants that I’ll be showing up for dinner soon—despite some that have offered to treat me nicely if I visit—I do have my picture on my site and I make reservations (and pay bills) under my real name. Since I’m not a major critic, I doubt it would make much difference. I think the role of the blogger critics is more to provide an alternative perspective than a definitive review.

Tuesday, September 10, 2013

Pasta e Fagioli (Pasta and Bean) Soup

Pasta e Fagioli Soup

Still in my "use up" mode, I knocked out a few more things from my pantry with this wonderful Pasta e Fagioli (Pasta and Bean) Soup.

A lot of people probably know Pasta e Fagioli from the Olive Garden, where it is one of their most popular soups. Although I'm generally not much of an Olive Garden fan, I have had this soup and it is pretty satisfying.

Cooking the ribs with the bones still in adds flavor to the soup.

For this version, I turned to the Italian cooking master Marcella Hazan, whose lasagna I so enjoyed earlier this year. She describes the cranberry bean (also known as the borlotti bean) as being the traditional bean for this soup, which she says has a flavor like chestnuts when fresh. It's clear she prefers fresh but says that dried work well too and that "if necessary, one may even use the canned." I may be turning a little red in admitting this, but the cans were what I used. If you can't find cranberry beans, kidney beans should work well here too.

Peeled whole San Marzano plum tomatoes
Be careful to reserve the tomato puree when removing the tomatoes from the can to chop them. I dumped the whole can into a bowl and fished out the tomatoes, returning them chopped to the bowl with their puree.

The recipe below adjusts the proportions from Hazan's original recipe to make a greater volume of soup by upping the volume of vegetables substantially and doubling the amount of pasta. Be warned that I didn't double the liquid, so this makes a rather thick soup. In fact, given the puree from the tomatoes and the exuded starch from the pasta, it's downright stew-like (especially when eaten the next day as leftovers). That was perfectly fine with me, but if you want a "brothier" soup, I suggest adding more liquid--perhaps another couple cups of beef broth or water.


The noodles I used, brichetti, look like little stubs of thick spaghetti. Any kind of small stubby pasta would work well here, such as ditalini (short tubes) or conchigliette (little shells).

Pasta e Fagioli (Pasta and Bean) Soup
Adapted from a recipe from Essentials of Classic Italian Cooking, Marcella Hazan

1/4 cup extra virgin olive oil
1 yellow onion, diced
Salt, to taste
1 carrot, peeled and diced
2 celery ribs, diced
3 pork spareribs, separated, fat cut off
28 oz. can of imported Italian plum tomatoes, cut up, with their juice (which is really more like a puree if you buy San Marzano tomatoes)
2 16-oz. cans of cranberry beans, drained and rinsed (may substitute other beans, such as kidney beans)
4 cups low-sodium beef broth
1 cup water
1 lb. brichetti pasta
Freshly ground black pepper, to taste
1/4 cup grated parmigiano-reggiano cheese
1 tbsp. unsalted butter
3-4 tbsp. chopped fresh Italian (flat-leaf) parsley

1. Heat olive oil over medium heat in an enamel Dutch oven or similar large soup pot. Add the onion, season to taste with salt and sauté until soft and golden, about 8 minutes.

2. Add the carrots and celery, stir to combine with the onion, then add the pork ribs. Cook for about 10 minutes, stirring occasionally.

3. Add the tomatoes and their juice and reduce heat to simmer, stirring frequently, for about 20 minutes.

4. Add the beans, stir to combine and cook for 5 minutes. Add the broth, cover the pot and bring to a gentle boil. Add the pasta and cook, at a gentle boil, until the pasta is almost al dente (let the residual heat finish cooking the pasta). Remove soup from the heat.

5. Remove the pork ribs and cut the meat from the bones (then discard the bones). Shred or chop the meat and return it to the pot. Season soup to taste with freshly ground black pepper. Stir in the parmesan cheese and butter. Serve in bowls topped with a sprinkle of fresh parsley.

Monday, September 9, 2013

Salmon with Yogurt-Dill Sauce

Salmon with Yogurt-Dill Sauce

Hunter Angler Gardener Cook, winner of this year's James Beard Award for best food blog, is a site I find myself turning to often. What sets Hank Shaw's blog apart from the pack, besides his great writing, is how connected his cooking is to foraging. He writes mostly about food he has hunted/caught/grown/gathered himself, which is pretty remarkable.

It's also quite different from my current experience. As an apartment-dwelling urbanite, I don't have the opportunity to obtain my food so directly, at least not on a consistent basis. Like many, I rely on the grocery store and farmers market to supply my raw materials.

But as a child, I grew up a family that, although primarily sustained by the grocery store, supplemented that with a fair amount of food from our own efforts. My grandmother's rather large (by city standards) vegetable garden supplied us with freshly grown vegetables, legumes and berries. She also raised chickens, and when I stayed with her, it was my job to collect the eggs. My mother also grew (and still does) vegetables and herbs in her garden. Last year she turned out some pretty peppery arugula and her tomatoes are always amazing.

And my father went after the game, mostly elk in the winter and fish in the summer. Being close to the Columbia River and the Pacific Ocean, we had access to all sorts of sea life, including fresh dungeness crab, sturgeon and, naturally, salmon.

Shaw's recipes for things like wild bullfrogs and wild bear are unlikely to ever be made in my kitchen; however, his fish recipes are more akin to something I have the tools and available ingredients to make. I've featured several in The Feed, including Salmon with Avocado Salsa and Steelhead with Sorrel Sauce and Salsify.

His recent recipe for butter-poached salmon with dill-horseradish cream inspired me to make something similar. As lusciously wonderful as butter-poached salmon sounds, I decided to a lighter route by just broiling my salmon, as I typically do, with a little bit of butter on top. I also used Greek yogurt, instead of sour cream for the sauce, which I tried before with tarragon and lemon and it worked great with the dill and horseradish in this recipe.

Yogurt-Dill Sauce with Horseradish

I mixed the butter with olive oil, which lowers its smoke point to prevent it from burning while the salmon cooks (it will still brown a bit, but browned butter is great). By spreading the butter/oil/garlic mixture on top of the fish with the flesh-side up, it melts into the fish as it starts to cook then pools on the bottom. Then, once it's time to flip the salmon, the fleshy side continues to cook in the garlicky buttery mixture.

Salmon with Yogurt-Dill Sauce
Inspired by Poached Salmon with Dill-Horseradish Cream by Hank Shaw of Hunter Angler Gardener Cook

Makes 2 portions (with lots of leftover sauce)

1 tbsp. extra-virgin olive oil
1 tbsp. unsalted butter, softened but not melted
2 tsp. finely minced garlic
Salt, to taste
3/4 lb. salmon fillets, skin on
3/4 cup (6 oz.) Greek yogurt
2 tsp. prepared horseradish sauce
1-2 tbsp. finely chopped fresh dill
Freshly ground black pepper (optional)

1. Preheat oven broiler with rack in highest position (4-5 inches from broiler).

2. Combine olive oil, butter, garlic and salt in small bowl.

3. Place salmon skin-side down on a lightly oiled rimmed baking sheet. (Note: I recommend using a small rimmed baking sheet or, better yet, creating a confined space for the salmon by placing it on a piece of aluminum foil with the ends folded up to make a 1/2-inch rim around it. This contains the oil and butter as the fish cooks, making it less likely to spread out and burn and also more likely to add good flavor to the fish). Spread the garlic mixture evenly on top of the salmon. Place under the broiler and broil for about 5 minutes. Turn the fish over and broil for another 5 minutes until desired doneness is achieved. Remove from oven.

4. While the salmon cooks, stir together the yogurt, horseradish and dill. If desired, add black pepper. When the salmon is finished, remove and discard the skin, divide the fish into two servings and serve it topped with the yogurt-dill sauce.

Friday, September 6, 2013

Cocktail: Last Word


Is it possible to have the last word on the Last Word? Perhaps not. It's a drink that just keeps resurfacing.

I learned about this cocktail via Twitter. What started as a tweet by Barina Craft to mark Aviation Day (August 19), appropriately with the Aviation Cocktail, morphed into a discussion of maraschino liqueur cocktails. After I'd suggested the Aviation Cocktail would probably be really good with Aviation Gin, said gin maker suggested checking out the Last Word. I looked it up and it sounded great.

As far as its history goes, this is a prohibition-era cocktail invented in the '20s at the Detroit Athletic Club, but it wasn't well known until the 1950s when Ted Saucier, a Waldorf-Astoria Hotel publicist, include the drink's recipe in his Bottoms Up cocktail book.

Flash forward another 50 years or so and the drink gets repopularized in Seattle by Zig Zag Café bartender Murray Stenson. According to Wikipedia, the drink became a cult hit and its popularity spread once again. It appears in Jim Meehan's modern classic, The PDT Cocktail Book.

So beloved is Stenson that when he suffered heart problem last year, a fund was formed to help him with medical expenses. Reports in the spring suggest he was recovering well. Surely he'll be back behind the bar again soon. Just like this drink.

The Last Word is wonderfully balanced between being tart and sweet, with just a bit of herbal flavor from the chartreuse. Of course, since they suggested it, I made it with Aviation gin, which has quickly become one of my favorites.

Last Word

3/4 oz. Aviation gin
3/4 oz. Green Chartreuse
3/4 oz. Luxardo maraschino liqueur
3/4 oz. fresh lime juice
Lime twist (optional garnish)

Combine ingredients in a shaker with ice. Shake until very cold and strain into a chilled cocktail glass. Garnish with lime twist.

Thursday, September 5, 2013

Spinach-Tomato Lasagna with Sausage

Spinach-Tomato Lasagna with Sausage

Needing to use up some of the food in my pantry, I searched for a recipe that would take out a couple of big-ticket items: a box of no-boil spinach lasagna noodles from Eataly and a large can of San Marzano peeled tomatoes. Lasagna is the perfect vehicle for such an enterprise, as its versatility makes it idea for all sorts of ingredients. I also used up some frozen spinach!

I adapted this recipe from The Key Ingredient, a recipe sharing site. It's originally from Cook's Country, the rustic Cook's Illustrated offshoot. I substituted a little lean Italian-style chicken sausage for some of the spinach, upped the quality (and reduced the quantity) of ricotta cheese by using fresh instead of part-skim, reduced the parmesan and omitted the eggs.


As such, it's a pretty basic lasagna that doesn't require an unusual amount of labor to come together as a tasty, satisfying meal. What hot dish coming out of the oven topped with melted, browned cheese is ever really bad anyway?


Spinach-Tomato Lasagna with Sausage
Adapted from Spinach and Tomato Lasagna, Cook's Country via The Key Ingredient

20 oz. frozen chopped spinach (I used two 10-oz. packages)
3 1/2 lb. of tomatoes (Use fresh, canned or a mix of both: I used half fresh tomatoes and half canned peeled San Marzano tomatoes--which was one 28-oz. can).
8 oz. mild Italian chicken sausage, removed from casings
1 tbsp. extra-virgin olive oil
1 sweet onion, diced
Salt, to taste
5 garlic cloves, minced
Pinch of red pepper flakes
Freshly ground black pepper
6 tbsp. chopped fresh basil
8 oz. (about 1 cup) fresh ricotta cheese
12 no-boil spinach lasagna noodles (I used Italian green lasagna noodles available at Eataly)
12 ounces whole-milk mozzarella cheese, shredded (3 cups)
1 cup grated parmigiano-reggiano cheese

1. Preheat oven to 375 F.

2. Cook spinach according to package directions in the microwave. Set aside to cool a bit and then squeeze out any excess moisture, reserving about 1/4 cup of the spinach liquid.

3. Pulse the tomatoes in a food processor until pureed.

4. Heat a large sauté pan over medium heat. Add sausage and cook, stirring occasionally until browned, about 10 minutes. Remove from pan and set aside.2. Add 1 tbsp. olive oil to the pan. When hot, add onion, season with salt and sauté until softened, about 5 minutes. Add garlic, red pepper flakes and pepper and cook another 3-5 minutes. Transfer the pureed tomatoes and 1/2 cup of the drained cooked spinach to the pan and cook over medium heat for about 10 minutes until thickened. Stir in the basil.

5. Add the ricotta, the rest of the spinach, and 2 tbsp. of the reserved spinach liquid to a food processor. Process until smooth. Add additional spinach liquid of the mixture seems too thick to easily spread.

6. Build the lasagna: In a 9 X 13 baking sheet, start by spreading about 1 1/4 cup of the tomato sauce on the bottom. Top with three noodles (lay crosswise and do not overlap noodles), spread 1/3 of the ricotta-spinach mixture on top of the noodles, about 1/4 of the mozzarella, 1/4 of the parmesan and finally another 1 1/4 cup of tomato sauce. Repeat two more times: (noodles, ricotta, cheeses and sauce), then top with the last 3 noodles, any remaining sauce and the remaining cheeses. Bake the lasagna in the oven until the cheese has melted and browned and the lasagna bubbles around the edges, about 40-45 minutes. Remove from oven and allow to cool 5 to 10 minutes before cutting.