Showing posts with label corn. Show all posts
Showing posts with label corn. Show all posts
Monday, August 22, 2016
Sweet Corn and Chorizo Tacos
Sweet corn, one of my favorite summer crops, is here. Really good sweet corn needs no adornment to be absolutely delicious. Corn-on-the-cob, prepared simply boiled, is summer perfection, requiring no butter or salt.
When you get your fill of that, fresh sweet corn is amazing in lots of other dishes, and one of my favorite things to do is stuff it into tacos with some spicy-sweet chorizo and fresh garnishes. With a mixture of textures and flavors, plus a simple preparation, this is summer cooking at its table-pleasing best.
Sweet Corn and Chorizo Tacos
Serves 2-3
3/4 lb. spicy fresh Mexican chorizo sausage, removed from casings
2 tbsp. extra virgin olive oil
1 sweet onion, diced
2 garlic cloves, minced
kernels cut from 2 ears of sweet corn
1/2 tsp. ground cumin
1/4 tsp. chipotle chili powder (use more or less as desired for heat)
1 tsp. dried oregano
Salt, to taste
8-10 corn tortillas, warmed
Crumbled queso fresco
6 radishes, cut into matchsticks
1/2 cup chopped fresh cilantro leaves
1. Heat a large skillet or frying pan over medium heat. Add chorizo and cook, breaking up with a wooden spoon, until the sausage is browned, about 10 minutes. Remove sausage from pan and set aside on a paper-towel-lined plate. Remove excess grease from pan.
2. Add 2 tbsp. olive oil to the pan. When hot, add the onion, garlic and corn, then season with cumin, chili powder, oregano and salt. Sauté until the vegetables have softened, about 10 minutes. Stir in the cooked chorizo and reheat a couple minutes, then turn off the heat.
3. Serve the corn-chorizo filling in warmed corn tortillas garnished with crumbled queso fresco, matchstick radishes and cilantro leaves.
Monday, September 21, 2015
Mexican Corn Soup
I know I just wrote about Corn-Leek Soup last week, but this Mexican variation on corn soup is just too good to pass up while the sweet corn is still good. This recipe comes from Ingrid Hoffman via Food Network. Hickory-smoked bacon gives it smoky meaty richness, the chipotle chili powder gives it a little kick and the toppings of avocado, cilantro and queso fresco add contrasting freshness.
Mexican Corn Soup
Adapted from a recipe by Ingrid Hoffman for Food Network
1/2 lb. thick-cut hickory-smoked bacon
1 yellow onion, diced
1 red bell pepper, cored and diced
4 garlic cloves, minced
4 ears of sweet corn
1 1/2 cups sungold cherry tomatoes
1 tbsp. fresh oregano leaves
4 cups low-sodium chicken broth
1/2 tsp. chipotle chili powder
1/2 cup sour cream
1/4 cup chopped fresh cilantro
1 avocado, diced
1/2 cup crumbled queso fresco cheese
1. Heat a Dutch oven or large soup soup pot over medium heat. Add bacon and cook until browned and crisped, turning occasionally. Remove bacon and set aside on a paper-towel-lined plate. Remove bacon fat in excess of about 2 tablespoons from the pot (discard excess grease). Add onion, bell pepper and garlic to pot and sauté until softened, about 8 minutes.
2. Cut off the kernels from two ears of corn and combine in a medium bowl with the cherry tomatoes, oregano and 2 cups of chicken broth. Puree mixture with an immersion blender until smooth (alternatively, combine ingredients in a blender and puree until smooth).
3. Add the pureed corn-tomato mixture, the remaining 2 cups of chicken broth and the chipotle chili powder to the pot with the onions. Increase heat and bring to a boil. Cut the corn kernels off the remaining two ears of corn, add the corn to the pot, reduce heat to medium-low and simmer until thickened, about 15-20 minutes.
4. Remove the pot from the heat. Stir in the cooked bacon, sour cream and half the fresh cilantro. Serve in large, shallow bowls topped with a little of the remaining cilantro, diced avocado and crumbled queso fresco.
Monday, September 14, 2015
Corn-Leek Soup
Earlier this year, I shared a recipe for a "punchier" potato-leek soup, which was my attempt to make a more flavorful version of the classic soup. Potato-leek soup is lovely, but unfortunately, it can be rather bland.
There's a fantastic solution available during the late summer: ditch the potatoes and replace them with corn. Hence, corn-leek soup, which is fantastic. Corn is naturally somewhat creamy too, so there's no need to add any dairy to this recipe, which is built with carrots, shallots, garlic and, of course, corn and leeks.
I'd intended to use vegetable broth in this, but I forgot to buy it, so I just used water. And you know what? I didn't miss the broth at all. There are so many flavorful vegetables in this soup that it makes its own broth. This soup was good both hot just after I made it as well as cold the next day.
Corn-Leek Soup
2-3 leeks
1/4 cup extra virgin olive oil
2 carrots, peeled and diced
2 shallots, minced
3 garlic cloves, minced
6 ears of corn, shucked
6 cups water
Salt, to taste (at least 1 tsp. recommended)
1/4 tsp. cayenne pepper
Freshly ground black pepper, to taste
1/4 cup chopped fresh chives
Smoked paprika, to taste
1. Remove the green leaves from the leaves, leave the root end intact and slice them in half length-wise. Rinse them with water, separating the layers, to wash away any grit. Chop the light green and white parts into 1/4-inch pieces.
2. Heat olive oil in a Dutch oven over medium heat. Add the leeks, carrot, shallot and garlic and sauté until softened, about 10-12 minutes.
3. Cut the kernels from the corn cobs. Do not discard the cobs. Add the corn kernels, corn cobs, water, salt, cayenne pepper and freshly ground pepper to the pot. Increase heat to high and bring to a boil. Reduce heat to low and simmer for 25 minutes.
4. Turn off the heat. Remove and discard the corn cobs. Puree the soup with an immersion blender until smooth or, alternatively, puree in batches in a blender. Serve in shallow bowls sprinkled with chives and smoked paprika.
Related
Punchier Potato-Leek Soup
Corn Soup
Friday, July 24, 2015
8-2-Eat: Summer Sweet Corn
8-2-Eat is my food-focused list series. A perfect Friday distraction. Today, I feature 8 great ways to enjoy fresh summer sweet corn.
Corn on the Cob. When you get really fresh, sweet corn that's so amazing by itself (like the kind I get at the New Morning Farm farmers market), it doesn't need anything more than a quick dip in boiling water to be absolutely delicious.
Corn Pancake with Blackberries. Corn for breakfast? Why not, when it's in the form of a delicious pancake (pictured above).
 |
| Roasted Corn and Chicken Enchiladas |
Corn Soup. This simple corn soup is inspired by one of my favorite New York food memories, when a simple bowl of chilled soup satisfied our hunger on a really hot day.
Bacon Barley Kale Corn Mushroom Soup. The name of this soup is a mouthful--a mouthful of deliciousness. I came up with this recipe last year as a way to combine ingredients with a range of savory flavors with sweet summer corn.
Corn Chowder. A simple summer classic.
 |
| MaCorny & Cheese |
Sweet Corn Ice Cream with Blackberry Sauce. Corn for dessert? Why not. It's naturally quite sweet, making it the perfect flavor for a delicious summer ice cream.
Friday, October 24, 2014
Southwestern Fall Grain Bowl with Turkey, Squash, Pecans and Sage
Last week, while my blog was "dark," Chris and I were on vacation traveling around national parks in the Southwest. Next week, I'll be sharing with you what we ate, a wonderful (well, mostly) mix of Southwestern delights like Mexican and barbecue, and a pretty amazing sage margarita in what might be my new favorite cocktail bar in Santa Fe.
When you have a great time on a vacation, it can be hard to let go. So consider this Southwestern-themed fall grain bowl my attempt to hold on to some of those very tasty memories.
 |
| Hominy |
 |
| Roasted butternut squash |
The resulting dish has a nice mix of sweet and spicy with a little bit of smoky too. It would make a great Thanksgiving stuffing actually. Vegetarians and vegans could easily omit the turkey and still have a wonderful dish.
Southwestern Fall Grain Bowl with Turkey, Squash, Pecans and Sage
Roasted squash:
1 lb. butternut squash, cut into 1/2 inch cubes
2 tbsp. olive oil
Kosher salt, to taste
Cooked grains:
2 1/2 cups water
1/4 cup wild rice
1 cup farro, rinsed
1/4 tsp. kosher salt
Glazed nuts:
1/3 pecans, coarsely chopped
1/4 tsp. New Mexico chili powder
Pinch of salt
2 tsp. agave nectar
Other ingredients:
2 tbsp. olive oil
1 yellow onion, diced
16 oz. can hominy, drained and rinsed
Salt, to taste
1 tbsp. (or to taste) New Mexico chili powder
2 tsp. ground cumin
2 tbsp. chopped fresh sage
1/3 cup dried cranberries
8 oz. smoked turkey, chopped
1. Preheat oven to 475 F. Combine squash, 2 tbsp. olive oil and salt in a large bowl and stir to combine. Spread squash on a baking sheet in a single layer and roast for 15 minutes. Stir and roast another 15-20 minutes until the squash is softened and lightly browned. Set aside (refrigerate if not using immediately).
2. Bring 2 1/2 cups of water to a boil in a large (4 qt.) saucepan. Add the wild rice and boil for about 4 minutes, then add the farro (cooking the wild rice by itself first adjusts for its slightly longer cooking time), cover the pot, reduce heat to low and simmer for about 15 to 18 minutes until the grains are cooked through but still a bit chewy. Drain of any remaining liquid and set aside.
3. Heat pecans in a small (8-inch) frying pan over medium-low heat. Once the nuts are fragrant, after about 5-6 minutes, sprinkle with chili powder and salt, then drizzle with the agave nectar. Stir to coat the nuts evenly and continue cooking until the agave has evaporated into a thick coating. Remove from heat.
4. Heat 2 tbsp. olive oil in a large sauté pan over medium heat. Add the onion and sauté until lightly browned, about 10 minutes. Add the hominy, then season with salt, chili powder and cumin, stirring to combine. Cook a couple minutes until the hominy has dried out a bit, then add the sage, dried cranberries and turkey. Add the roasted squash, cooked grains and glazed nuts, stirring until evening combined and heated through. Serve mixture in shallow bowls.
Friday, September 12, 2014
Shrimp with Fresh Corn Grits
When it comes to food, Chris and I are generally on the same page. But one thing that I really like that he's not a big fan of is shrimp. So on a recent weeknight when I had the home to myself, I decided to make this wonderful recipe I found in Bon Appétit for shrimp and grits.
This Southern classic is traditionally served a breakfast, although it's not uncommon to see it on dinner menus (DC's Vidalia has a shrimp and grits dish with mustard greens and ham that sounds amazing).
A particularly adventurous aspect of this dinner was that I peeled and de-veined the shrimp myself--an experience worth doing if you're curious about what it entails and can't find the already peeled and de-veined kind.
Although Whole Foods often has already peeled and deveined shrimp, when I made this dish, they only had the kind that still has the shell and legs attached. The shell, which protects the shrimp's abdomen, is called the carapace. Using your fingers on the underneath side, it's pretty easy to separate the legs and shell from the body. You can pull the legs off first, but it's not necessary. The shell will come off in one piece, generally consisting of about three segments. Leave the final segment before the tail intact (the segment without any legs attached).
The deveining part is a bit more complicated, and also deceptive. See, there are two parts of the shrimp that could conceivably be the "vein," although in truth, neither is. On the bottom side (the side where the legs were attached), there is a visible "vein" that is the shrimp's central nerve. You can remove this if you want, but most people just leave it there, especially for small to medium-size shrimp. The "vein" people talk about removing is on the back of the shrimp (the side under the shell). This is actually the shrimp's intestinal tract, sometimes referred to as the "sand vein." To remove it, use a paring knife to make a slit about 1/8-inch deep on the back of the shrimp from the head end to the tail. The vein may be dark gray but sometimes (I suppose if the shrimp hasn't eaten recently), it's just white. Use the tip of the knife to pry the vein out and discard it. The shrimp is now ready to cook.
Since I'd never done this before, it took me awhile to get through the shrimp--about a half an hour--and my fingers smelled a bit "shrimpy" afterwards, even after multiple washings. For a few more dollars, if available, I'd probably buy the already prepped kind. But if you like this kind of prep work, it's really not that bad.
Shrimp with Fresh Corn Grits
Adapted from a recipe in Bon Appétit
3 ears of corn, husks removed
2 cups low-sodium chicken broth
1 cup whole milk
1 1/2 cups water
3/4 cup grits (not instant)
2 tbsp. unsalted butter
Salt and freshly ground black pepper
1/4 cup olive oil
2 garlic cloves, thinly sliced
1/2 tsp. dried oregano
1/2 tsp. smoked paprika and a pinch of cayenne pepper
1 1/2 lb. large shrimp, peeled, deveined, with tails intact
1 tbsp. chopped fresh chives
1. Using the large holes of a box grater, grate the kernels off of 2 ears of corn into a medium bowl, catching as much corn juice as possible. Run a knife over the cobs to extract any remaining juice and let it drip into the bowl. Using a knife (or specialized tool), remove the whole kernels from the third ear of corn. Discard the cobs.
2. Combine broth, milk and water in a large (4 qt.) saucepan and bring to a boil. Reduce heat so that liquid is at a simmer (a touch below medium) and whisk in the grits. Simmer, whisking frequently, until the grits are very tender, about 20-25 minutes. Stir in the butter and grated corn with corn juice. Season with salt and pepper. Set aside for about 15 minutes.
3. Heat olive oil in a large sauté pan or frying pan over medium heat. Add the garlic, oregano and paprika and cook, stirring frequently, until fragrant, about 30 seconds to 1 minute. Add the whole orb kernels and cook, stirring occasionally, until golden brown, about 5 minutes. Add shrimp and cook, tossing occasionally, until cooked through, about 5-6 minutes.
4. Spoon the corn grits into a shallow bowl and serve topped with the cooked shrimp and corn mixture. Garnish with fresh chives.
Thursday, September 11, 2014
Corn Chowder
Summer is coming to a close, which means markets--both the farmers variety and the typical grocery store--are loaded with fresh vegetables. One of the great ones I find is particularly good from our farmers market is sweet corn. The corn that New Morning Farm sells in my neighborhood market on Saturday mornings is juicy and sweet and pretty affordable too.
Although we usually enjoy it boiled on the cob, I've found a few other good uses for summer sweet corn. This chowder, for example, is a great way to enjoy is corny sweetness as a soup. This is a pretty simple recipe that uses potato to give the chowder body and onion, garlic and herbs for additional flavor.
Corn Chowder
Adapted from a recipe by Tyler Florence for Food Network
2 tbsp. butter
1 tbsp. extra-virgin olive oil
1 yellow onion, diced
2 garlic cloves, minced
2 tbsp. fresh thyme leaves
1/4 cup all-purpose flour
6 cups low-sodium vegetable stock (if desired, you can make your own corn broth, which would be delicious in this dish)
2 cups heavy cream
2 medium-size potatoes, peeled and diced
6 ears of corn
Salt and freshly ground black pepper, to taste
1/4 cup chopped fresh parsley leaves
1. Heat the butter and olive oil in a Dutch oven or other large pot over medium heat. Add the onion, garlic, and thyme and sauté until the vegetables have softened, about 8 to 10 minutes.
2. Dust the vegetables with the flour and stir to coat. Add the vegetable stock and bring to a boil. Add the cream and the potatoes, increase heat to bring to a boil and boil the mixture for about 7 minutes until the potatoes break down.
3. Cut the kernels off the corn cobs and add the kernels to the soup, discarding the cobs. Season with salt and pepper and simmer until the corn is soft, about 10 to 12 minutes. Serve in shallow bowls garnished with fresh parsley.
Tuesday, June 10, 2014
Bacon Barley Kale Corn Mushroom Soup
This soup is kind of a mutt, but I love it anyway (mutts tend to be lovable, don't they?). In making it, I thought a little bit about corn chowder and tom kha tai soup, although the resulting product doesn't really resemble either. It's a nice blend of earthy and fresh flavors, well suited for these waning days of spring and summer starts to really hit.
Besides bringing together all these great flavors, I wanted a soup that would be a good vehicle for chervil from my herb garden. Chervil looks a lot like parsley, and I've read they are related, although I think chervil has a pretty different flavor--more floral and less sharp than parsley. Lacking chervil, which I've never been able to find in a grocery store or farmer's market (hence my desire to try growing it), you could substitute fresh parsley.
 |
| Fresh chervil. |
Bacon Barley Kale Corn Mushroom Soup
1/2 pearled barley
6 oz. hickory-smoked bacon, cut into 1/4-inch strips (lardons)
1 sweet onion, diced
2 carrots, peeled and diced
3 garlic cloves, smashed
8 oz. cremini mushrooms, stemmed and quartered
1 bunch of kale, stemmed and cut into 2-inch pieces
8 cups low-sodium chicken broth
2 tsp. dried thyme
1 dried bay leaf
2 cups fresh or frozen sweet corn kernels
1 tsp. arrowroot powder
1/4 cup white balsamic vinegar (may substitute apple cider vinegar or white wine vinegar, but not dark balsamic vinegar)
3/4 cup heavy cream
1/2 cup chopped fresh chervil (may substitute parsley or other leafy green herb)
1. Bring 1 1/2 cups water to boil in a medium saucepan. Add barley, cover and reduce heat to simmer for 40 minutes. Remove lid and set aside.
2. Heat a Dutch oven over medium heat. Add bacon and cook until crisped. Remove bacon from pot with a slotted spoon and set aside. Remove any bacon fat from the pot in excess of about 2 tablespoons. Add the onion, carrots and garlic and cook until softened, about 10 minutes. Add the mushrooms and cook until browned, about 5-7 minutes. Add the kale and cook about 2-3 minutes until it begins to wilt. Add the chicken broth, thyme and bay leaf and increase heat to medium-high to bring to a boil. Add the corn, cooked bacon and cooked barley and reduce heat to medium. Simmer for 10-15 minutes. Turn off the heat.
3. Mix arrowroot powder with 1 tbsp. water to create a slurry then stir into the pot. Add the vinegar and cream and stir to combine. Serve in bowls topped with a sprinkle of fresh chervil.
Thursday, November 7, 2013
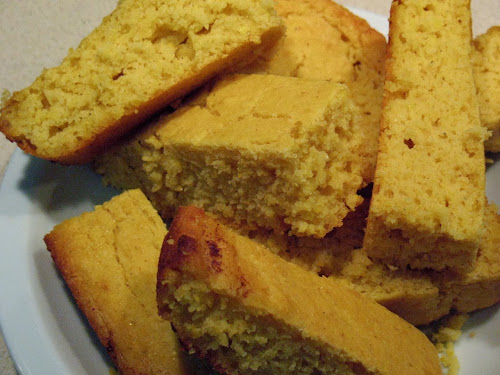
Simple Cornbread
Today's Southwestern Cornbread Stuffing uses a custom cornbread with Southwestern flavors. For something more traditional, I also wanted to share this recipe, which I first made last year as “Corny Corn Bread."
It takes Mark Bittman's simple corn bread recipe and amps up the corn flavor with a little ground freeze-dried corn. It's perfect corn bread for stuffing or by itself a Thanksgiving side.
I discovered freeze-dried corn when making Momofuku Milk Bar's recipe for Corn Cookies. It's available online from Amazon. You may also be able to find it in stores like Whole Foods.
Corny Cornbread
Adapted from Cornbread by Mark Bittman
1/2 cup ground freeze-dried corn
1/2 cup all-purpose flour
1 cup corn meal (finely ground)
1 tsp. salt
1 1/2 tsp. baking powder
2 tbsp. sugar
1 large egg
1 1/4 cup buttermilk
2 tbsp. unsalted butter
1. Preheat oven to 375 F.
2. Combine dry ingredients in a large bowl. Separately, combine egg and buttermilk, add to dry ingredients and stir until just combined.
3. When oven is hot, put an 8 x 8 inch baking dish in the oven. Remove after a couple minutes when when the baking dish hot and add the butter, put back in the oven and let it melt (be careful not to let it burn, as butter will scorch at this temperature).
4. Remove hot pan with melted butter from oven and pour batter into pan. Bake for about 30 minutes until top is lightly browned and a toothpick inserted in the center comes out clean. Let cool a bit, but serve warm.
Thursday, October 3, 2013
Shutdown Survival Cooking
Most of the recipes I write about on Cook In / Dine Out can be made in less than an hour. While I'm not aiming to write a convenience cooking site, it's just a practical matter: I work full-time and I don't have time to make elaborate meals during the week. When you do see longer recipes on my site, they're probably ones I made on a weekend.
With the federal government having shut down, many home cooks may find themselves with extra time to explore midweek cooking that's more involved than usual. Seize the opportunity to make something special for your family, your sweetie or just yourself. Besides filling time, a tasty cooking project can nourish your body and your soul. Plus, it provides the satisfaction of accomplishing something.
Below are some of the more time-intensive recipes I've featured, sorted by category. I've also discussed ways to cut costs on some of the recipes, since, non-pay status makes splurging on luxury food items feel like, well, a luxury. By their nature though, a lot of recipes that take a long time to cook don't use expensive ingredients. It's the time and care that bring out their good flavors.
 |
| Bolognese lasagna, from Marcella Hazan's recipe, is a great afternoon cooking project with common ingredients. |
Meats
The complex flavor of bolognese sauce comes from slowly cooking it over the course of the afternoon. This Bolognese-Style Lasagna takes the better part of the day to make, given the time for the sauce, assembling the dish and baking it. The recipe is from Italian-food cook Marcella Hazan, who died this week. Cost savings: nothing in this recipe is particularly expensive except possibly the tomatoes if you buy an imported brand.
Spice-Brined Roast Chicken will easily fill up several days, since it requires an overnight brine, drying time and the actual roasting. Cost savings: there's no getting around the cost of the chicken, although if you substitute whatever spices you have on hand for the brine, that's really the only cost in this dish.
Slow-cooking meats is the sort of day-long process I usually only have time for on the weekend. Slow cooking is a great way to treat pork shoulder which, in the Carnitas Tacos, gets an additional broil in the oven to crisp it up a bit. Although the pork has many hours of inactive cooking, this recipe will fill that time as you prepare the homemade corn tortillas and corn salsa, refried black beans and guacamole garnishes. Cost savings: the pork shoulder is the only major cost of this dish; the masa harina, while seemingly exotic to some, is less expensive (and way tastier) than store-bought corn tortillas. If you don't have a tortillas press, roll the balls of dough out between two sheets of plastic wrap or parchment to about 1/8-inch thickness.
Stews
The very word "stew" implies something that is cooked slowly over a period of many hours. I've made two really incredible stews this year that are well worth their time. Jacques Pepin's Beef Stew in Red Wine Sauce is about the best Beef Bourguignon I've ever had. The meat is first browned on the stove and then roasted in the oven with the wine for a long time. The vegetables are cooked separately and then combined in the end. Cost savings: use less-expensive beef chuck in place of flatiron steak; any red wine will work, although make sure it's one you would also drink (don't substitute a so-called "cooking wine").
Smoky Red Wine, Pinto Bean and Bacon Soup, an absolutely wonderful recipe by New York Times writer Melissa Clark, still takes hours to prepare, despite the time I shaved off by cooking the beans with a faster method. If you love beans and bacon, this is the best way I've ever had them together. Cost savings: using dried beans is more economical than canned; use any red wine you have on hand, but don't substitute a bad wine or that will be reflected in your dish.
 |
| Sweet Corn Agnolotti, from a recipe by Mike Isabella, takes time to prepare the filling, sauce and assembly. |
Homemade Pasta
It's so easy to open a box of dried pasta and boil it. It's another thing to make your own. Fresh pasta has a flavor and texture that dried pasta just cannot beat. For something simple, try Fresh Pasta with Homemade Ricotta and Roasted Tomato Sauce (homemade ricotta is another good cooking project). For something more involved, try Toasted Fazzoletti with Mushrooms and Hazelnuts or, if you're really up to a challenge, Sweet Corn Agnolotti with Mushrooms, from a recipe by Mike Isabella of Graffiato and Top Chef. Cost savings: Although pasta (semolina) flour is often recommended, you can make pasta with standard all-purpose flour. Substitute sauce ingredients as needed.
Gnocchi
Gnocchi dishes come together in a snap if you use store-bought gnocchi. Making your own takes time, but I think you'll find it's worth it. You can get much lighter, tastier dumplings if you make them yourself. Although potato is traditional, such as in Gnocchi with Sausage-Mushroom Ragu, using other root vegetables like sweet potatoes (Sweet Potato Gnocchi with Sage) or beets (Beet Gnocchi with Walnut-Sage Butter) are more flavorful. Cost savings: at their most basic, gnocchi are just potato, flour, egg, salt and water, so they're pretty inexpensive; it's the sauces that may set you back more, so feel free to experiment and substitute with what you have on hand.
 |
| At the tail end of tomato season, it's the perfect time to roast tomatoes and use them in something like this panzanella. |
Roasted Tomatoes
It takes a good 2 1/2 to 3 hours to roast tomatoes, so any of the dishes I've made with them will take at least the afternoon to prepare. Homemade roasted tomatoes are amazing--such a depth of flavor. Recipes include Creamy Roasted Tomato Gazpacho, Roasted Tomato Risotto, Tomatoes Two-Ways Pasta, Pizza, Roasted Tomato Panzanella and even Roasted Tomato Cocktails. Cost savings: although I strongly recommend using fresh, seasonal tomatoes, even grocery-store tomatoes will improve with roasting.
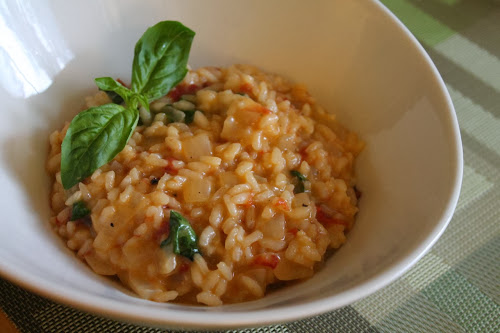 |
| Making your own broth, such as roasted tomato broth, greatly enhances the flavor of this risotto over a store-bought substitute. |
Stock
For lots of recipes, I turn to the 2- or 4-cup boxes of premade stocks and broths, which is an enormous time-saver for midweek cooking. But if you have the time, homemade stock is worth it. I've made two vegetable stocks that I really like: one for Navy Bean Soup with Kielbasa and another with Roasted Tomatoes that I used for making risotto. Cost savings: As money-saving dishes go, stocks are one of the best, since you can use whatever vegetables (including scraps) and seasonings you have on hand.
 |
| Blackberry-Vanilla Ice Cream Pie with Corn Cookie Crust requires first making two separate recipes and putting them together into a delicious final product. |
Desserts
The fastest way to slow down a dessert is to add multiple stages. Ice cream pies, for example, require first making cookies and pulverizing them to form the crust ingredients, plus making the ice cream, before forming the crust, spooning in the ice cream and freezing it. It's a great way to showcase unique flavor combinations. Check out Cereal Milk Ice Cream Pie with Compost Cookie Crust or Blackberry-Vanilla Ice Cream Pie with Corn Cookie Crust. Cost savings: for the corn cookies, substitute either corn flour or a mix of fine corn meal and flour for the ground freeze-dried corn. Ingredients in the compost cookies can be substituted for whatever snacky things you have on hand--various chips, nuts, etc.
In addition to being a multi-stage dessert, Cereal Milk Baked Alaska with Brown Butter Cake requires extra time in the freezer between steps (very important time, by the way; the first time I made Baked Alaska I skipped some freezer time and really regretted it). Caramelized Parsnip Layer Cake requires extra time to first prepare, roast and mash the parsnips. Cost savings: for the cereal milk ice cream, substitute any flavorful sugary cereal for the Cinnamon Toast Crunch if you don't have that (Honey-Nut Cheerios would be good, I bet); carrots could be used instead of parsnips in the cake.
Monday, September 2, 2013
Sweet Corn and Carrot Soup
Happy Labor Day! Is it feeling like fall is approaching yet? Not really around D.C., where it's nice and muggy lately. Still, I tell myself cooler weather is just around the corner.
This is a great recipe for this time of year because it makes use of seasonal vegetables and can be served warm or cold, depending on your mood and the ambient temperature. As a pureed soup, it has a pretty smooth texture, but to add a little textural interest I reserved some raw corn kernels to toss in at the end.
Sweet Corn and Carrot Soup
2 tbsp. extra-virgin olive oil
2 large (or 4 small) shallots, minced
5-6 carrots, peeled and diced
3-4 garlic cloves, minced
Seasoned salt (or plain salt), to taste
5 ears of corn, kernels cut off and cobs reserved
6 cups water
Freshly ground black pepper, to taste
Pinch of cayenne pepper (or more to taste)
1/4 cup heavy cream
Smoked paprika, to taste
Snipped fresh chives
1. Heat olive oil in a dutch oven over medium heat. Add shallots and carrots and sauté until softened and lightly browned, about 10 minutes. Season with salt, then add garlic and all but 1 cup of the corn kernels, sautéing another 5 minutes. Add water, reserved corn cobs and cayenne pepper, and bring to a boil. Reduce heat to low, cover and simmer for 45 minutes.
2. Remove corn cobs and discard. Using an immersion blender, puree the soup until smooth (alternatively, transfer in batches to a food processor and puree). Stir in the reserved uncooked corn kernels and heavy cream. Serve in shallow bowls topped with a sprinkle of smoked paprika and chives.
Friday, August 9, 2013
Sweet Corn Ice Cream with Blackberry Sauce
I was so enamored by the flavor of the reduced corn juice used in the Sweet Corn Agnolotti that I thought it would be delicious to use in making ice cream too. Apparently I'm not the only one who thinks corn ice cream is worth a try: Melissa Clark wrote about it in the New York Times last week.
 |
| Fresh sweet corn kernels |
Since I've been using the Jeni Britton Bauer method of ice-cream-making a lot lately, I decided to go the more traditional egg custard route with this recipe. This ice cream has intense corn flavor and just the right level of sweetness.
I imagine any simple berry topping would be good on this. I decided to go with blackberries this time, but was awfully tempted by the blueberries (I'm saving them for panna cotta, which I hope to share with you soon).
Sweet Corn Ice Cream
6 ears of corn
2 cups heavy cream
1 1/2 cups whole milk
3/4 cup sugar
1/4 tsp. salt
5 egg yolks
Blackberry sauce (see recipe below)
1. Cut the kernels off the cobs and reserve the cobs. Scrape the cobs with the back of the knife to extract any remaining bits of corn and juice. Transfer kernels and scrapings to a food processor (fitted with the standard blade) and process for 1 1/2 minutes until pureed and smooth. Scrape down the sides of the bowl and process another 20 seconds or so to incorporate. Discard the cobs or keep them for another use (like making corn stock).
2. Place a fine-mesh sieve over a mixing bowl and strain the corn mixture, pressing on the solids to push through as much juice as possible (I did this in batches of about 1/3 cup, using the measuring cup to push on the solids, which worked really well). This should make about 1 1/2 cups of corn juice.
3. Transfer corn juice to a large (4 qt.) saucepan and cook over medium heat for about 5 minutes, stirring frequently, until the juice reduces to about 1 cup. Add heavy cream, whole milk, sugar, salt and reserved corn cobs. Increase heat to medium-high and cook until the mixture reaches a temperature of 165 F. Reduce heat to low and simmer for 15 minutes. Remove and discard corn cobs.
4. In a small bowl, whisk together egg yolks. Whisk in about 1/2 cup of the warm cream mixture to temper the eggs, then whisk the egg mixture into the warm mixture in the saucepan. Continue cooking, whisking constantly, until the mixture reaches 180 F. Strain mixture with a fine mesh sieve and transfer to a large (1 gallon) resealable bag. Submerge in an ice water bath for about 10 minutes then chill in the refrigerator until cold.
5. Process in an ice cream maker according to the manufacturer's directions. Transfer to a container and freeze until hard. Set out a few minutes to soften a bit before serving.
 |
| Cooking blackberry sauce. |
Blackberry Sauce
1 cup fresh blackberries
1/4 cup sugar
1/4 cup water
Combine berries and sugar in a medium saucepan over medium heat. Cook, stirring frequently until the mixture boils, reduces and thickens, about 5-7 minutes. Stir in the water. Allow to cool and, if desired, strain out the seeds with a mesh sieve. Transfer sauce to a container to store in the refrigerator.
Thursday, August 8, 2013
Roasted Corn and Chicken Enchiladas
When it comes to my favorite Mexican comfort food, chicken enchiladas have to be at or near the top of the list. Anything with layers of meat, vegetables, cheese and tortillas that's baked in the oven until it's all warm and a bit gooey can't be a bad thing. In some ways, it's a lot like lasagna (which hadn't dawned on me until a coworker saw me reheating some of these as leftovers and asked if that's what it was).
 |
| Homemade corn tortillas add a special touch (and they're really easy, seriously). |
 |
| Spicy tomato sauce made with San Marzano crushed tomatoes. |
 |
| Roast the corn until the kernels are fragrant and some are browned. |
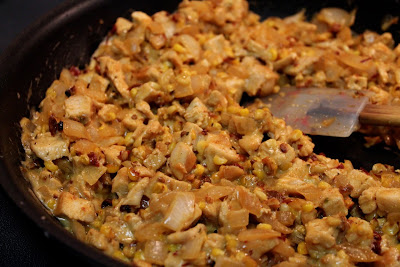 |
| The corn and chicken enchilada filling is a bit moist from the béchamel, but not excessively so. |
For this version, I wanted a satisfying filling that was neither dry nor overly rich. I knew I wanted roasted corn and chicken, but what else? Some recipes don't include any kind of binding to make the filling saucy, but I wanted my enchilada filling to be a bit moist. Other recipes include sour cream, but I didn't want them to be that rich. Seeking a happy medium, I used a little bit of a light béchamel, which achieved just right balance of thickening the filling without making it excessively creamy.
 |
| Assemble the enchiladas by first laying down some sauce, then adding the stuffed, rolled tortillas in rows. Finish with more sauce, cheese and herbs. |
I was quite pleased with how this turned out. They're a little spicy but not overly so. If you want them spicier, just use more chipotles in adobe, which impart a wonderful spicy-smoky flavor. If you can't find San Marzano crushed tomatoes, you could use any type of tomato puree.
Roasted Corn and Chicken Enchiladas
4 ears of sweet corn
Olive oil spray
2 tbsp. vegetable oil
1 lb. chicken breast cutlets
Seasoned salt, to taste
5 tsp. ground cumin seed
2 tsp. dried oregano
2 tsp. fine garlic powder
1 sweet onion, diced
2 canned chipotle chili peppers in adobe sauce, plus extra sauce (if you open a can, you can put the rest in a sealable bag and freeze them)
1 tbsp. unsalted butter
1 tbsp. all-purpose flour
1 cup milk (I used skim)
8 oz. shredded monterey jack cheese
15 oz. San Marzano crushed tomatoes
12-16 corn tortillas (I used homemade ones, which vastly superior to store-bought, here's the recipe)
3 tbsp. chopped fresh chives (may substitute cilantro)
1. Preheat oven to 400 F. Shuck the corn and cut the kernels off the cob. Spray a baking sheet with olive oil and spread the kernels evenly across it. Roast the kernels for 20-25 minutes until they are browned in places and a bit shriveled. Set aside to cool. Reduce oven temperature to 350 F.
2. Heat vegetable oil in a large frying pan over medium heat. Add chicken, season with seasoned salt, 2 tsp. ground cumin, oregano and 1 tsp. garlic powder. Sauté chicken until cooked through, about 10 minutes, turning halfway. Remove chicken from pan, allow to cool a bit, then chop into small pieces (no larger than 1/2-inch).
3. Add onion to the same frying pan (add a little vegetable oil if the pan is dry), season with seasoned salt and 1 tsp. of ground cumin, and sauté until softened, about 5-7 minutes. Stir in the chopped chipotles in adobe. Remove from pan.
4. Melt butter in the same frying pan. Add flour and whisk to combine. Cook until thickened and lightly brown, whisking continually, for about 2 minutes. Add milk and whisk to combine. Cook until the mixture is thick and bubbly. Stir in about a cup of the shredded cheese until it melts. Turn off the heat and stir in the roasted corn, sautéed chicken and onion mixture.
5. Meanwhile, make the tomato sauce: pour crushed tomatoes into a medium saucepan and heat over medium-low heat. Add remaining 2 tsp. ground cumin, 1 tsp. of garlic powder and 4 tsp. of the adobo sauce from the canned chiles (may add more or less adobo sauce depending on how spicy you want it). Stir ingredients together and cook until the mixture just starts to get a little steamy (you don't want to boil it). Remove from heat.
6. If not using freshly made (and therefore still warm) corn tortillas, warm tortillas in a frying pan or in the microwave wrapped in damp paper towels.
7. Assemble enchiladas: Set out a 9 X 13 baking dish. Spread about 1/4 cup of the tomato sauce on the bottom of the dish. Take a tortilla and add about 1/4 cup of the chicken mixture (use more if the tortillas are larger--mine were about 5-6 inches diameter). Roll tightly and place seam-down in the baking dish. Repeat, lining the filled tortillas up in rows until the dish is full. Depending on the size of the tortillas, you should be able to get at least 12 in and possibly as many as 15 or 16. Pour the remaining tomato sauce over the top and spread evenly with a spatula. Top with the remaining shredded cheese and sprinkle with fresh herbs. Bake in the oven until the cheese is melted and the tortillas start to brown a bit, about 20-25 minutes. Remove from oven and allow to cool 5-10 minutes before serving.
Subscribe to:
Posts (Atom)

