Thursday, November 28, 2013

Thanksgiving Leftovers Tacos


What would a proper Thanksgiving dinner be without leftovers the next day? As exciting as the dinner itself may be, I have a sneaking suspicion there's a not insignificant portion of the population that's actually more excited about the food the next day. Freed from its more formal presentation Thursday, Thanksgiving leftovers on Friday are a chance to experiment and get creative.

Sandwiches are the easy way out and, while certainly satisfying, I like to find other interesting ways to use up that little bit of cranberry, that massive mound of bread stuffing. In that vein, last year I offered a Thanksgiving leftovers pizza topped with turkey and various sides. This year, I'm headed south to the versatile taco.

Tacos and Thanksgiving leftovers are made for each other. You can fill a taco with just about anything, although with a little care, the tacos can be especially good. A few tricks: don't over-stuff them. Focus on a combination of a couple ingredients and garnishes that complement each other. Offset something savory with a little something sweet. And don't over-carb it. Piling potatoes on stuffing in a tortilla seems like a bit much.

Tacos frequently have the one thing missing from Thanksgiving: fire. So I spiced this dish up by further seasoning the turkey and adding a spoonful of salsa verde with poblano pepper. Prepping the turkey is pretty simple: I chopped it and reheated it in a frying pan with a little oil and the additional seasonings of oregano, cumin and chipotle chili powder. Salsa verde requires a little more work, but comes together in about 40 minutes. If you don't feel like making it, you could buy it. Same goes for the totillas (although they really are better homemade).

Thanksgiving Leftovers Tacos

Serves 4 (3 tacos each)

2 tsp. olive oil or vegetable oil
12 oz. roasted turkey, chopped
1 tsp. ground cumin
1/4 tsp. chipotle chili powder
1/2 tsp. dried oregano
1/2 tsp. garlic powder
12 corn tortillas (see recipe to make your own)
Green tomatillo salsa (see recipe below)
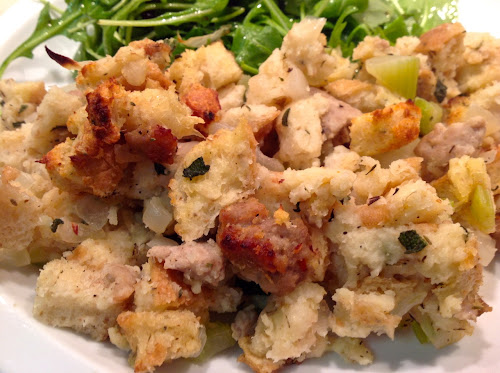
4 cups of basic bread stuffing (such as southwestern cornbread, classic 11-ingredient bread, or rye bread stuffing)
1 cup whole-berry cranberry sauce
1/2 cup chopped fresh cilantro

1. Heat olive oil in a medium frying pan over medium heat. Add chopped turkey and season with cumin, chili powder, oregano and garlic powder. Stir to combine and cook until fragrant and heated through.

2. Assemble tacos: start with a corn tortilla base. Top with a little spiced turkey, salsa verde, bread stuffing, a spoonful of cranberry sauce and a sprinkle of cilantro.

Salsa Verde (Green Tomatillo Salsa)
Adapted from a recipe by Mark Bittman, How to Cook Everything

6 tomatillos, husks removed and rinsed
1 tbsp. vegetable or olive oil
3/4 cup diced sweet onion (about 1/2 onion)
1 poblano pepper, seeded, ribs removed and finely diced
1 garlic clove, minced
Salt, to taste
2 tbsp. chopped fresh cilantro

1. Preheat oven to 400 F. Place tomatillos in a rimmed baking sheet. Roast in the oven until softened, about 20-25 minutes. Remove, allow to cool a bit, and dice.

2. Heat oil in a large frying pan over medium heat. Add onion, poblano pepper and garlic and season with salt. Sauté until the vegetables are quite soft, about 10 minutes. Add chopped, roasted tomatillos and 1/2 cup of water. Increase heat until mixture boil, then reduce heat to medium for an active simmer. Cook until the liquid has reduced, about 7-8 minutes. Transfer mixture to a food processor and pulse to a chunky puree. Stir in the chopped cilantro.

Wednesday, November 27, 2013

Thanksgiving 2013 Recipes: Quick Reference

Thanksgiving recipes 2013

Here's a rundown with links to all of the Thanksgiving recipes I've featured this year. Come back Friday to find out what I think you should do with your leftovers!

Turkey

Roasted Turkey Breast with Herb Butter - Compound herb butter tucked under the turkey skin promotes crispness and flavor; a simple way to infuse the meat with good flavor when you don't have time for a brine.

Easy Turkey Gravy - Banish your fears of unsatisfying gravy and skip the jarred kind with this simple recipe for making the real thing.

Stuffings

Southwestern Corn Bread Stuffing - Spicy chiles and other Tex-Mex flavors give this stuffing a sensation that's rare to Thanksgiving fare: a fiery kick.

Rye Bread Stuffing - Spicy rye bread gives an unexpected dimension to this bread stuffing with onion, bacon and apple.

Classic 11-Ingredient Bread Stuffing - A simplified basic stuffing recipe that still packs lots of great flavor.

Other Sides

Green Bean Casserole with Bacon and Mushrooms - This updated version of the Thanksgiving classic made with fresh, not canned, ingredients has really struck a chord with readers: it's my most popular Thanksgiving recipe this year.

Roasted Sweet Potatoes with Bourbon-Maple Glaze and Smoked Almonds - A sweet potato side that, instead of being overly sweet, punches up the toasty, smoky flavors of bourbon, maple and smoked almonds.

Cheesy Scallion-Corn Biscuits - Manchego cheese and green onions elevate the flavor of a Thanksgiving favorite. They're even better with Homemade Compound Butter.

Wheat Berry Salad with Butternut Squash, Hazelnuts and Sage - A healthy, whole-grain side that would be a great reminder of Thanksgiving flavors any time of year.

Kale-Swiss Gratin and Swiss Chard Grain - Leafy greens and cheese come together in these simple baked vegetable sides with a bread-crumb topping.

Baked Apples with Fennel and Onion - Too often relegated to dessert, with this side, I wanted something that could bring apples to the main Thanksgiving course.

Sautéed Garlic-Ginger Green Beans - A simple green beans side with a bit of Asian flavor.

Simple Corn Bread - The corn bread stuffing above uses a special "Southwestern" corn bread, but if you just want a good basic version, you can't go wrong with this.

Desserts

Bourbon-Caramel Pumpkin Tart - A beautiful, rich and absolutely delicious dessert alternative to pumpkin pie from a Fine Cooking recipe.

Apple Custard Pie with Gingersnap Crust - Because I couldn't decide between pumpkin and apple pie, I decided to combine the best of both with this apple custard pie, supported by a tasty gingersnap cookie crust just because.

Appetizer

Butternut Squash and Goat Cheese Crostini with Crispy Shallots - A beautifully presented way to tempt your Thanksgiving guests before the big meal.

Cocktail

(Wild) Turkey with Cranberry - For fans of turkey and cranberry on Thanksgiving, here's a different take on that classic pairing, made with Wild Turkey rye whiskey, cranberry bitters, Aperol, ginger liqueur and a flamed orange peel.

Leftovers

Thanksgiving Leftovers Tacos - Fill corn tortillas with a mix of leftovers and top with a dollop of green tomatillo salsa for a tasty alternative to sandwiches.

Plus...don't forget about last year's recipes, which included a wonderful herb-and-spiced-brined roasted turkey breast, Oregon and Italian stuffings, hot butternut rum cocktail, a roasted parsnip and quinoa salad and an apple pie with vodka crust.

Tuesday, November 26, 2013

Butternut Squash and Goat Cheese Crostini with Crispy Shallots

Butternut Squash and Goat Cheese Crostini with Crispy Shallots

On the outside you're calm and cool, but on the inside you're just a little bit frazzled. Thanks to your careful planning, your Thanksgiving feast is about to come together (almost) seamlessly, at least enough that your guests will be duly impressed.


There are a few last-minute touches that require your attention though, and your guests have just arrived. This is the time to make the gravy, reheat the stuffing and make sure the wine is properly chilled. It's not time to hear about your nephew's basketball team, your best friend's new business venture or grandma's recent trip to Greece.


What do you do? Distract them--with food of course. It's always good to serve a Thanksgiving appetizer, preferably with a good cocktail, so that you, the cook, can be free to complete your meal. These butternut squash crostini foot the bill perfectly, since they can be made mostly ahead of time, requiring just a little last-minute assembly. Crostini are relatively mess-free, require no utensils and are crowd-pleasing. Perfect.


You can make the squash and goat cheese mixture ahead of time and refrigerate it. You can even fry the shallots ahead of time too (make sure they're cool before you refrigerate them). Then toasting the bread just takes a couple minutes and, with a pastry bag, piping the filling onto the toasts is a snap.


Butternut Squash and Goat Cheese Crostini with Crispy Shallots

1 butternut squash
4 tbsp. extra-virgin olive oil, divided
Salt and freshly ground black pepper, to taste
1 French baguette
1 cup canola oil
1 large or 2 smaller shallots, peeled and thinly sliced (thinner than 1/8 inch)
4 oz. soft goat cheese (chevre)
1 large or 2 small shallots
2 tbsp. fresh snipped chives

1. Preheat oven to 350 F.

2. Peel squash and cut into cubes no larger than 1-inch. Combine cut squash, olive oil, salt and pepper in a large bowl and toss to combine. Transfer to a foil-lined baking sheet and roast in the hot oven for 40 minutes, stirring halfway through. Remove from oven and allow to cool a bit.

3. Preheat oven broiler with rack in top position. But baguette into slices about 1/2-inch thick. Place on a baking sheet and brush top of bread slices with olive oil. Broil until lightly browned, which only takes a couple minutes (watch closely so they don't burn). Remove from oven.

4. Heat 1 cup of canola oil a medium skillet or wide saucepan over medium heat until the oil shimmers. Add the shallots and fry into golden-brown, about 10 minutes (may take more or less time, watch to prevent burning). Remove shallots with a slotted spoon and transfer to a paper-towel-lined plate.

5. Microwave the goat cheese for 30 seconds to soften it. Add the cheese and roasted squash to a food processor and process until smooth, scraping down the sides after a couple minutes. Transfer squash mixture to a small bowl and stir in the chives. Scoop mixture into pastry bag with a star tip. Pipe squash mixture onto toast rounds. Top with a few crispy shallots.

Monday, November 25, 2013

Cheesy Scallion-Corn Biscuits

Cheesy Scallion-Corn Biscuits

I love Thanksgiving biscuits. Usually, the traditional buttermilk ones will suffice. But this year I wanted to shake things up a bit. I wanted something really flavorful.


I thought of corn biscuits with a little onion and cheese. This recipe from Bon Appétit, with a few tweaks, was exactly what I was looking for. They went perfectly with the homemade chive compound butter I made.


Cheesy Scallion-Corn Biscuits
Adapted from Buttermilk Biscuits with Green Onions, Black Pepper, and Sea Salt, Bon Appétit

Makes 14-16 biscuits

2 cups all-purpose flour
2 tsp. baking powder
1/2 tsp. baking soda
1/4 tsp. salt
1/2 cup yellow cornmeal
3 tbsp. sugar
Freshly ground black pepper, to taste
8 tbsp. (1 stick) unsalted butter, cut into 1/2-inch cubes
1/2 cup shredded cheese (I used manchego; cheddar, gruyere or jack would also be good)
1/2 cup finely chopped scallions (mostly white and light green parts)
3/4 cup buttermilk

1. Preheat oven to 425 F with rack in middle position.

2. In a food processor, pulse flour, baking powder, baking soda, salt, cornmeal, sugar and pepper until combined. Scatter butter cubes across mixture and pulse until the mixture resembles coarse sand. Dump into a large bowl, add cheese, scallions and buttermilk and stir until the dough is mostly clumped together.

3. Transfer dough to a floured surface. Knead gently to combined into one mass. Using a floured rolling pin, roll dough out to thickness between 1/2 to 3/4 inches. Cut out rounds with a 2-inch biscuit cutter

Gather dough together. Turn dough out onto floured surface and knead gently just to combine, about 3 to 4 turns. Roll out to 3/4-inch thickness. Using floured 2-inch cookie or biscuit cutter, cut out rounds. Reroll scraps and cut out additional rounds. Place 2 inches apart on prepared baking sheet. Brush tops of biscuits with melted butter. Sprinkle each lightly with coarse sea salt and ground black pepper.
Bake biscuits until golden and tester inserted into center comes out clean, about 20 minutes. Cool slightly. Serve warm or at room temperature.

Homemade Compound Butter

Homemade compound butter

In second grade, we made butter. It was one of those "hands on" things you do as part of learning about Oregon pioneer history. The process was pretty simple: the kids in my classroom took turns shaking a jar of cream until butter solids formed. Eventually, voila...butter.

Steps for making homemade butter
At first, the whipping will expand the cream's volume, but eventually it breaks down.

So yes, making your own butter is simple enough that a 7-year-old (or rather a room 30 of them) could do it. Lacking 60 hands, you can do it yourself in a snap using a stand mixer. Jessie Cross's blog, The Hungry Mouse, walks through the process nicely with step-by-step photos.


Strain out the buttermilk from the butter solids.

Once the butter is made, you're free to dress it up as you like, turning it into compound butter, especially if you're making it to be a spread. I added kosher salt to mine, since the larger salt crystals give a nice burst of flavor in your mouth. My other flavoring was chopped fresh chives. For other compound butter ideas, see this recent Wall Street Journal story by Gail Monaghan.

Homemade butter
Form the butter solids into a ball, squeezing out excess moisture.

Since this butter hasn't been treated in an industrial manner, it won't keep as long in your fridge, so be sure to use it within a few days. This recipe makes 1/3 of a pound of butter, or just a little over a typical stick (which is 1/4 lb.). Scale up as needed. It's a wonderful spread for Cheesy Scallion-Corn Biscuits.

Homemade compound butter
Salt and herbs can be added to room-temperature butter to make compound butter.

Homemade Compound Butter

2 cups heavy cream, chilled
Kosher salt, to taste (optional)
Chopped fresh chives (optional, may use other herbs or seasonings, including honey, smoked paprika, cracked pepper, etc. Use as little or much as you like)

1. Add cream to the bowl of a stand mixer fitted with the wire whip attachment. Whip the cream at medium-high speed until the cream has separated into butter solids and buttermilk. (As you whip the cream, it will first increase in volume, passing through progressively stiffer phases of whipped cream. Eventually, the whipped cream will break down and reduce in volume as butter solids form, resulting in a mix of butter solids and liquid buttermilk).

2. Scoop the butter solids out of the bowl and transfer to a fine-mesh strainer set above a bowl. Using your hands, squeeze the solids together to form a bowl, working to squeeze out any excess buttermilk. This is plain butter, which you can use. Continue the recipe if you want to make compound butter.

3. Allow the butter to soften to room temperature (use the microwave to speed this up if you want, but don't melt the butter). Stir in the salt and chopped fresh herbs. Serve compound butter at room temperature.

Friday, November 22, 2013

Thanksgiving Cocktail: (Wild) Turkey with Cranberry


Turkey with cranberry is the quintessential centerpiece of a good Thanksgiving meal. With this cocktail you get to enjoy it before dinner too.

Not turkey in the poultry sense, but Wild Turkey rye whiskey, which I've mixed with a combination of flavors that evoke cranberry sauce: ginger liqueur, Aperol (which is made with bitter orange) and cranberry bitters. In additional to being a beautiful color, it's tasty too. And potent! This will get your Thanksgiving off to a festive start for sure.

If getting your guests too intoxicated before dinner is a concern, you could cut the whiskey and Aperol amounts in half and serve the drink on the rocks topped with club soda.

(Wild) Turkey with Cranberry

1 1/2 oz. Wild Turkey rye whiskey
1 oz. Aperol
1/2 oz. ginger liqueur (such as Domaine de Canton)
3 dashes Fee Brothers cranberry bitters
Flamed orange peel*

Combine the whiskey, Aperol, ginger liqueur and cranberry bitters in a cocktail mixing glass filled halfway with ice. Stir until very cold, about 15 to 20 seconds. Strain into a chilled cocktail glass. Flame the orange peel, rub it around the rim of the glass and drop it in the drink.

*To flame an orange peel, cut a round piece of peel off of a fresh orange (it's okay to include some pith). Strike a match. Hold the orange peel by its edges skin-side down above the drink. Put the lit match between the orange peel and the drink. Flex the orange peel quickly, releasing its oils, which ignite from the match as they drop into the drink.

Thursday, November 21, 2013

Roasted Sweet Potatoes with Bourbon-Maple Glaze and Smoked Almonds


There's a traditional Thanksgiving sweet potato dish that calls for lots of brown sugar and marshmallows. I'm sure it has a place in many hearts, but not mine. I like my sweet potatoes to have more body and flavors beyond just the sweet.

This Bon Appetit recipe is still a pretty sweet dish, but has many other flavors as well--the earthy depth of maple, the smoky-saltiness of the almonds and the bitterness of coffee. That it hits most of the major taste centers is a good thing: this is a well-rounded dish that's sure to please.

I adjusted the recipe only by cutting back the butter, by about half, and adjusting the times for making the glaze, which I found required more time to reduce in the first step and less time in the second one.

Roasted Sweet Potatoes with Bourbon-Maple Glaze and Smoked Almonds
Adapted from Sweet Potatoes with Bourbon and Maple, Bon Appetit

5 lbs. red-skinned sweet potatoes (about 8), peeled and cut into 1 to 2 inch pieces
4 tbsp. unsalted butter
2 tbsp. extra-virgin olive oil
Kosher salt and fresh ground black pepper to taste
1 1/2 cups strong hot coffee
9 tbsp. pure maple syrup
3 tbsp. dark brown sugar
1/2 tsp. instant espresso powder
1/2 cup bourbon
1/2 cup chopped smoked almonds

1. Preheat oven to 425 F with racks in upper and lower third positions. Add sweet potatoes to a large bowl. Melt 3 tablespoons of butter and combine with olive oil. Pour butter and oil over sweet potatoes, season with salt and pepper and stir to coat. Divide potatoes between two rimmed baking sheets. Roast potatoes until they are tender and start to turn golden brown and crisp around the edges, about 40-50 minutes. Transfer potatoes to a serving platter.

2. While the potatoes roast, make the glaze. Add coffee, maple syrup, brown sugar and espresso to a medium saucepan. Heat over medium-high heat until sugar dissolves and mixture boils. Cook until thick and reduced by half (Bon Appetit's recipe stated this takes 6 to 7 minutes, but in my experience, it took about 15 minutes to reduce the roughly 2 1/4 cup mixture to just over 1 cup).

3. Remove syrup from heat. Stir in bourbon and remaining tablespoon of butter. Reduce heat to medium and simmer until sauce is reduced to about 3/4 cup (again, my experience differed from the recipe, which called for simmering for 40-45 minutes, but I found that after 15 minutes it had reduced enough). Season with salt and pepper to taste.

4. Drizzle sauce over roasted potatoes and sprinkle with chopped smoked almonds.

Wednesday, November 20, 2013

Easy Turkey Gravy


Turkey gravy is an essential part of the Thanksgiving meal. Well, one that includes turkey anyway. Yet, I bet a lot of people resort to gravy from a jar, even if they've gone to the trouble to roast a full turkey, because they fear their gravy won't turn out right. It will be lumpy, runny or bland.

But homemade gravy really isn't that hard. This recipe is really quite simple. It doesn't call for milk, there's no chance for undercooked flour and it comes together in about 15 minutes--just the right amount of time while the turkey is resting after its roast.

Cook the drippings and flour until lightly browned to ensure the gravy doesn't have a raw flour taste. Stir with a flat whisk to remove lumps.

The key to keeping the gravy from not turning lumpy is to use a flat whisk to keep the flour in motion once it's been added to the pan drippings. That's really the only trick. Otherwise it's basically an overcooked roux with some chicken or turkey stock and a little herbs if you like (I used thyme, but bay leaf is good too).

Simple Turkey Gravy

Note: This recipe makes about 2 cups of gravy, using the drippings from a roasted turkey breast. If you've roasted a whole turkey, you can certainly make more by scaling up the ingredients. It may need to simmer longer.

Pan drippings from roasted turkey breast (if less than 2 tablespoons, add butter)
2 tbsp. all-purpose flour
2 cups low-sodium chicken broth or turkey stock
Salt and freshly ground black pepper, to taste
1/2 tsp. dried thyme

Add pan drippings and butter if using to a medium frying pan over medium heat. Add flour and cook, whisking constantly, until browned, about 2 minutes. Add broth, season with salt, pepper and thyme, and increase heat to medium-high. When mixture boils, reduce heat to medium and simmer for 5-7 minutes until thickened. Transfer mixture to a pourable container (such as a Pyrex glass measuring cup) to cool a bit before serving.

Tuesday, November 19, 2013

Sautéed Garlic-Ginger Green Beans

Garlic-Ginger Green Beans

For another variation on a green bean side dish, this Asian-style dish adds a dose of bright flavors. Although it seems trendy to leave fresh green beans whole, I like to cut them into 1 1/2-inch pieces so they're easier to eat.

Sautéed Garlic-Ginger Green Beans

1 lb. fresh green beans, trimmed and cut into 1 1/2-inch pieces
2 tbsp. olive oil
1 tbsp. minced fresh ginger
2 garlic cloves, minced
Pinch of chili pepper flakes
2 tsp. lemon zest
1 tbsp. fresh lemon juice
1 tbsp. soy sauce
Sesame seeds (optional garnish)

1. Heat a large saucepan half filled with water over medium-high heat until boiling. Add beans and cook for 2 minutes. Drain and set aside.

2. In a medium frying pan, heat olive oil over medium heat. Add ginger and garlic and saute until softened but not browned, about 2 minutes. Sprinkle with chili pepper flakes. Increase heat to medium-high. Add drained beans to pan and sauté, stirring frequently, until lightly browned. Add lemon zest, lemon juice and soy sauce and stir to coat beans. Remove from pan and serve topped with sesame seeds.

Monday, November 18, 2013

Classic 11-Ingredient Bread Stuffing

Classic bread stuffing

Stuffings, technically "dressings" but I like to call them stuffings so it doesn't sound like we're talking salads, are a great way to experiment with flavor at Thanksgiving. I've already shared recipes for Rye Bread Stuffing and Southwestern Cornbread Stuffing, and last year I had Italian Stuffing and Oregon Stuffing--all variations on the same theme.

But sometimes you just want something basic and classic like this dish. I pared down the ingredients to the minimum for a satisfying traditional Thanksgiving sausage and bread stuffing. With fewer ingredients, it becomes more important to choose good ones to maximize flavor, such as the sourdough bread and breakfast sausage with sage I used here.


Using this recipe, you could customize the dish with additional ingredients: toss in some nuts, dried fruit or other vegetables. Switch up the bread. Omit the sausage or use a different meat like bacon or prosciutto.

Classic 11-Ingredient Bread Stuffing

1 1/2 lb. sourdough bread loaf, cut into 1/2-inch cubes
1 lb. bulk breakfast sausage with sage
1 tbsp. unsalted butter
1 sweet onion, diced
3 celery ribs, diced
2 tbsp. chopped fresh sage
1 tsp. dried thyme
Salt and pepper
2 cups chicken broth
2 eggs, lightly beaten

1. Preheat oven to 300 F. Divide bread cubes between two baking sheets. Bake in oven for about 30 minutes. Remove from oven and set aside to cool and dry.

2. Preheat oven to 400 F.

3. Brown sausage in a large frying pan over medium heat. Remove from pan and set aside on paper towels. Wipe out pan and place over medium heat. Melt butter and sauté onion and celery until soft. Stir in sage and thyme and season with salt and pepper. Cook another minute. Remove from pan.

4. In a large bowl, combine dried bread cubes, cooked sausage and cooked vegetables. Add chicken broth and eggs. Stir to combine. Pour mixture into a 9 x 13 baking dish. Bake for 40 minutes, stirring after 20 minutes, until cooked through and lightly browned on top.

Friday, November 15, 2013

Apple Custard Pie with Gingersnap Crust

Apple custard pie with gingersnap crust

I love apple pie. I also love pumpkin pie. If I had to make just one for Thanksgiving, it would be hard to choose. Here's my attempt at having it both ways: an apple pie with the texture of pumpkin pie. Intrigued?


This apple custard pie takes the technique of pumpkin pie but substitutes apple puree for the pumpkin. To make it even more interesting, instead of a traditional crust, I used gingersnap cookie crumbs.


I love the texture of this pie. It's like eating pumpkin pie but with the brighter taste of apple. Plus the ground apple retains just a bit of crispness.


For the pie technique, I relied on America's Test Kitchen's recipe for pumpkin pie, which I've made before (and loved). The apple puree is pretty much like making applesauce except without any added sugar or spices.


Apple Custard Pie with Gingersnap Crust
Technique partially adapted from Pumpkin Pie, America's Test Kitchen

4 large Granny Smith apples (use 5 if they are smaller), about 2 pounds, peeled, cored, quarted and chopped into 1/4-inch thick pieces
1/2 recipe gingersnap cookies
6 tbsp. unsalted butter, melted
1 cup packed light brown sugar
1 tsp. ground cinnamon
1/2 tsp. ground ginger
1/2 tsp. ground nutmeg
1/4 tsp. salt
2/3 cup whole milk
2/3 cup heavy cream
4 large eggs

1. Preheat oven to 400 F.

2. Heat a large saucepan over medium-high heat. Add apples and 1/3 cup water. Cover and cook until the mixture boils. Reduce heat to medium-low and simmer until the apples are very soft, about 15 minutes. Transfer to a food processor and puree until very smooth. Transfer mixture back to saucepan and cook over medium-low heat, stirring frequently, until mixture is thickened (it should be as thick as pumpkin puree). You should have about 2 cups (16 oz.) of puree (don't fret if you have a little less). Set aside.

3. Break the gingersnap cookies into large chunks. Pulse in a food processor until ground to crumbs (there should be no large chunks). Transfer to a bowl. Add the melted butter and stir with a fork until combined. Transfer the mixture to a pie plate. Using your fingers, press the buttered crumbs into the bottom and sides pan. Be sure there are no thick spots, especially where the bottom meets the side. (Note: some recipes instruct you to bake the prepared crumb crust before filling it. I did not do this, as I didn't want the crust to get too crisp. If you choose to bake it, see this article on crumb crusts).

4. Combine apple puree, brown sugar, cinnamon, ginger, nutmeg and salt in a large saucepan over medium heat. Once the mixture begins to sputter, cook, stirring constantly, for about 5 minutes. Add the milk and heavy cream and cook until the mixture simmers.

5. Add the eggs to a food processor and turn on. With the machine running, add half the hot apple mixture through the feed tube. Process for about 30 seconds then transfer the apple-egg mixture to the pot with the remaining apple mixture and stir to combine. Pour the hot mixture into the prepared cookie crust. Bake until the filling is puffed and dried out on top, about 25 minutes. Cool on a wire rack then refrigerate. Serve chilled.

Thursday, November 14, 2013

Thanksgiving Greens Gratins

Kale-Swiss Gratin

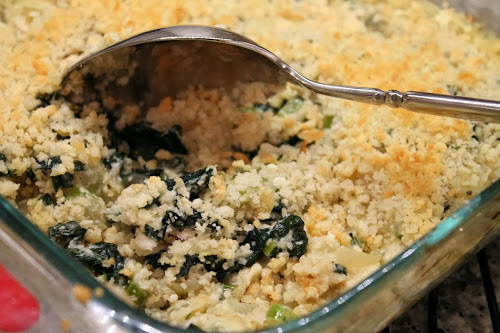
As a way to squeeze another vegetable side on your Thanksgiving table, gratins (pronounced GRAH-tun or gruh-TAN) with greens are a great way to go. The two I'm sharing today follow the same basic formula: start with cooked greens (kale or Swiss chard specifically), mix with sautéed onion and mornay sauce (i.e. bechàmel with cheese melted into it), top with bread crumbs and bake.

A defining feature of a gratin is a brown crust. Since these are topped with bread crumbs, I like to finish the dish with a quick jolt under the broiler. Alternatively, you could use shredded cheese.


Kale-Swiss Gratin

1 bunch of kale (I used lacinato kale, but any type would work), leaves separated from stems (stems reserved)
2 tsp. plus 1 tbsp. unsalted butter
1/2 cup panko bread crumbs
1/4 cup grated pecorino romano cheese
2 tbsp. olive oil
1 medium yellow onion, diced
5 garlic cloves, minced
Salt and freshly ground black pepper, to taste
1 tbsp. all-purpose flour
1 cup whole milk
1/2 tbsp. Dijon mustard
Dash of ground nutmeg
3/4 cup shredded emmentaler cheese

1. Preheat oven to 400 F with rack in the upper third of the oven.

2. Chop the kale leaves into pieces about 1 1/2- to 2-inches wide. Cut half of the kale stems into 1/2-inch dice (it will be used below), keep remaining stems for something else or discard. Bring a large saucepan with two quarts of salted water to boil. Cook the kale leaves in the boiling water until tender, about 3 to 4 minutes. Remove from water and set aside to cool. Squeeze leaves to remove excess moisture and set aside in a large bowl.

3. Melt 2 tsp. butter in a small frying pan over medium-low heat. Add panko crumbs, stir to coat with butter and toast in the pan, stirring occasionally, for about 10 minutes. Set aside to cool then combine in a small bowl with the grated pecorino romano cheese.

4. Heat olive oil over medium heat in a large frying plan. Add onion and sauté until softened, about 8 minutes. Add garlic, season with salt and pepper and cook another couple minutes. Remove from pan add to large bowl with the cooked greens.

5. In the large frying pan over medium heat, add the remaining 1 tbsp. butter. When melted, add the flour and whisk to combine. Cook, whisking constantly, until lightly browned, about a minute or two. Add the milk, mustard and nutmeg, whisk to combine and cook until the mixture bubbles and thickens. Reduce heat to medium-low and add the shredded cheese. Whisk until the cheese is melted and the sauce is smooth.

6. Pour cheese sauce over cooked vegetables in the large bowl and stir to combine. Transfer to a buttered 9 x 9 baking dish. Spread the toasted panko mixture evenly over the top. Bake in the hot oven about 15 to 20 minutes until the mixture bubbles. If the crumb topping hasn't browned, turn on the oven broiler and broil until browned (watch closely, as it won't take long, probably less than a minute). Remove from oven and allow to cool a bit before serving warm.


Swiss chard gratin

Swiss Chard Gratin
Adapted from Alice Waters' Swiss Chard Gratin, The Wednesday Chef

Note: The original recipe did not contain cheese.

1 bunch of chard
Salt
1 cup fresh breadcrumbs*
2 tbsp. plus 2 tsp. unsalted butter 
2 tablespoons butter
1 yellow onion, diced 
Salt
2 teaspoons flour
1/2 cup milk
A few strokes of freshly grated nutmeg
3/4 cup shredded gruyere cheese

1. Cut the chard leaves from the stems and chop the leaves into pieces about 1 1/2 to 2 inches wide. Cut half of the stems into dice. Bring a large saucepan with 2 quarts of salted water to boil. Add the chard leaves to the pot and cook until tender, about 3 to 4 minutes. Remove leaves from pot, allow to cool a bit, then squeeze leaves to remove excess moisture. Set aside in a large bowl.

2. Preheat oven to 350 F. Melt 2 tsp. of butter. Combine fresh breadcrumbs with melted butter, spread on a baking sheet, and toast in the oven until lightly browned, about 10 minutes. Set aside to cool until ready to use. Leave oven on.

3. Heat a large sauté pan or frying pan over medium heat. Add 1 1/2 tbsp. of butter. When butter is melted, add onion and cook for about 5 minutes. Add diced chard stems, season with salt, and cook until onion and chard are softened, about 3 to 5 more minutes. Sprinkle with flour and stir to combine. Add milk and nutmeg and cook for 5 minutes, stirring occasionally. Add the cheese and stir to combine as the cheese melts.

4. Lightly butter a 9 X 9 baking dish. Spread cooked mixture evenly in dish. Cut remaining 1/2 tbsp. of butter into bits and spread across the top of the mixture. Then sprinkle the toasted fresh breadcrumbs evenly over the top. Bake until the gratin is bubbling and lightly browned on top, about 20 to 30 minutes.

*To make fresh breadcrumbs, cut the crust from bread, tear bread into large pieces and pulse in a food processor until you've achieved the desired crumb size.

Wednesday, November 13, 2013

The Feed: November 12, 2013


The Feed is my weekly round up of interesting food-related stories from newspapers, magazines, blogs and websites.


Great week for the Washington Post! Normally I don't include more than one or two stories from a single publication, but the Post really had a banner week.

Washington Post: “Cook smarter. You’ll be happier in the kitchen,” by Bonnie S. Benwick.
Cooking doesn’t have to be complicated. But people like me who cook a lot probably take it for granted that for many, walking into the kitchen to prepare a meal from scratch, even from a recipe, can be a daunting task. Bonnie Benwick offers tips that can help the novices and even the pros maneuver their kitchens in a smarter, more efficient manner. Bonnie’s first tip is a really good one: read through a recipe with a critical eye. She says, “…nobody likes the surprise of a stop in the action to soak beans or pickle something.” So true. I’ve been stopped dead in my tracks a few times by a “chill overnight” instruction for a dish I’m hoping to have ready in a few hours. Skipping that step generally results in disaster. Another gem I employ a lot: “There’s no need to chop everything beforehand if the first ingredients need to marinate or cook/bake for a while; those minutes can be used to prep what’s next on the list.”

Seems lots of people are getting back into the habit of really cooking again, but it can be hard to balance a full-time or more job with making dinner for an hour or more on the same day. In comes ScratchDC to the rescue, a company that delivers to your home prepared kits of pre-measured ingredients with recipes so that you can make dinners like Chicken Cacciatore Over Farfalle and Eggplant & Chickpea Coconut Curry Over Rice. Basically, they’re removing the time and guesswork involved in grocery shopping, prep and measurement (this fun video explains how it works). Carman took it upon himself to compare a ScratchDC-prepared meal with an actual cooked-from-scratch meal, as well as one prepared from convenience food (i.e. pre-prepped foods from the grocery store). I won’t give away his results, but they weren’t what I was expecting. 

Continuing her Unearthed column examining different sides on key food debates (her last column, also on genetically modified organisms or GMO, appeared during a week I didn’t publish The Feed), Haspel asks supporters and opponents to list both benefits and problems with GMO in attempt to find common ground on this hottest of hot contemporary food debates.

Washington Post: “Spirits: The taste of apples, distilled,” by M. Carrie Allan.
Perfectly timed for the arrival of fall’s true chill, Carrie Allan writes about apple brandy, touching on the history of apples’ role in alcoholic beverages with a particular focus on Laird & Company, the longstanding company famous for its apple-based spirits, particularly applejack. Allan also offers a recipe for a the “Modernized Scotchem,” an updated take on a classic apple cocktail made with sharp and sweet mustard.

I know I mentioned Tim Carman above, but I couldn’t take a pass on including his interview with Hunter Angler Gardener Cook blogger Hank Shaw where they talked about cooking duck. Shaw was in town last week, cooking at Range to promote his new cookbook, Duck, Duck, Goose.

Buzzfeed: “The Easiest Thanksgiving That Anyone Can Make,” by Christine Byrne.
“So you’ve never cooked Thanksgiving before?” That’s the question that begins this clever post that provides simple instructions with many helpful visuals for making a simple 5-recipe Thanksgiving dinner. Byrne cuts a few corners, fine for a novice cook (like pre-made pie crust), but I definitely wouldn’t recommend making mashed potatoes with a hand mixer (use a potato masher—the mashed potatoes should have some texture). I love that she included Brussels sprouts.

Time: “7 Foods That Won’t Be the Same If Trans Fats Are Banned,” by Alexandra Sifferlin.
A lot has been said this past week about the FDA’s proposal to eliminate trans fat. Sifferlin’s story looks at the consequences, not for our health, which would almost certainly be positive, but how it might affect a handful of popular foods.

CNN Eatocracy: “Always in season: salt and pepper,” by America’s Test Kitchen.
Salt n pepa’s here! Sorry, couldn’t resist. No, not the female rap trio from the late ‘80s, but good ol’ salt and pepper. America’s Test Kitchen shares a great list of common varieties of these two most popular seasonings and their uses.

New York Times Magazine: “The Great Old-Fashioned Debate,” by Rosie Schapp.
It’s probably not as “important” as the GMO food debate mentioned above, but nonetheless, arguments about the proper styling of an Old Fashioned cocktail can get just as heated. With vintage cocktails having made a popular resurgence, the minimalist original version of the Old Fashioned is holding sway these days. But Schapp has a soft spot for the muddled fruit version--the first style she learned to make. Reminds me of how I feel about chardonnay. Sure the unoaked variety is all the rage these days but dang if I don't prefer the big, buttery, oaky traditional California style. 

Wall Street Journal: “Some Food Companies Ditch 'Natural' Label,” by Mike Esterl.
Despite strong sales for foods labelled "natural," many companies are ditching the adjective amid false-advertising lawsuits. A lack of a clear definition and disagreement over whether foods containing processed ingredients may be labelled natural has also eroded its popularity. I completely support this. Sure "natural" sounds good, but without a clear definition, you really don't know what you're getting from a "natural" product versus one without such a label (unnatural, perhaps? who knows).

Tuesday, November 12, 2013

Rye Bread Stuffing

Rye bread stuffing

Last week, for those looking for an adventurous Thanksgiving stuffing, I offered my recipe for Southwestern Cornbread Stuffing. For something more traditional, but by no means plain, I offer this rye bread version.

This is a great stuffing for those who like their mixture loaded with savory herbs and spices, and the rye bread provides a lot of flavor here. When using a fresh loaf of bread, a good first step is to dry the bread cubes out in the oven. Alternatively, you can leave bread out over night to dry.

Rye Bread Stuffing

1 loaf rye bread, cut into 1-inch cubes
1/4 lb. bacon, cut into 1/4-inch lardons
2 tbsp. unsalted butter
1 medium yellow onion, diced
1 granny smith apple, peeled, cored and diced
Salt and freshly ground black pepper, to taste
3 garlic cloves, minced
1 tsp. dried thyme
1/4 cup chopped fresh sage
1/4 cup chopped fresh flat-leaf (Italian) parsley
1 large egg, beaten
2 cups low-sodium chicken broth

1. Dry the bread cubes: Preheat oven to 350 F. Spread the bread cubes in an even layer on a baking sheet. Bake in the oven about 10 minutes. Remove from the oven and allow to cool (they will dry out more as they cool, be sure not to cover them).

2. Heat a large sauté pan over medium heat. Add the bacon and cook until browned. Remove bacon with a slotted spoon and transfer to a paper-towel-lined plate. Discard the rendered bacon fat. Add butter to the pan. When melted, add the onion and apple. Season with salt and pepper and cook until softened, about 8 to 10 minutes. Add garlic, thyme, sage and parsley and cook another couple minutes until the mixture is fragrant with garlic.

3. Combine the bread cubes, bacon and cooked onion mixture in large bowl. Add the beaten egg and chicken broth and mix until combined. Transfer mixture to a 9 x 13 baking dish. Allow to sit on the counter for about 5 minutes, then bake in the oven (at 350 F) for 40 to 45 minutes, stirring every 15 minutes.

Monday, November 11, 2013

Fresh Take on Green Bean Casserole

Updated green bean casserole

Fans of classic green bean casserole look away now. You're not going to like what I have to say about the drab, sodium-laden dish that graces far too many Thanksgiving tables every year.

I think the idea of cooking green beans with mushrooms and onions to produce a mixture of soft and crisp textures is wonderful. I just don't think the way most people do it--i.e. with canned cream of mushroom soup, canned green beans and canned fried onions (remarkable that you can get this canned) is the way to go.

Fresh cut green beans

Sauteed Cremini mushrooms

With this recipe, I sought to reinvent classic green bean casserole with fresh ingredients and lots of flavor, while being true to the original recipe's principal ingredients: mushrooms, onions and, of course, green beans. I also made the recipe with no cans, everything is fresh, which improves the nutritional profile of dish considerably, especially the sodium, even though I made it with added bacon and cheese (more on that later).

Green beans, mushrooms, onion and bacon

Bechamel with gruyere

Instead of cream of mushroom soup, I used mushrooms, specifically creminis, which I sautéed. I also used fresh green beans instead of canned (or frozen), which provide a brighter color and better texture. Substituting sautéed onions for the fried onions does mean a loss of crispiness. To compensate, I added a finishing coating of toasted panko. Additional flavor boosts came from the hickory-smoked bacon and the gruyere cheese, which I melted into a béchamel sauce, not too dissimilar from how you make a mornay cheese sauce for mac & cheese. A little white wine and a dash of nutmeg give the sauce a refined flavor.


Amazingly, despite being made with bacon and cheese, my dish has less than half the sodium content of the traditional version made with canned ingredients. Using a recipe calculator, I estimated that the Campbell's recipe if made with regular cream of mushroom soup, Green Giant brand canned green beans and French's french-fried onions, contains about 6,016 mg of sodium, or 1,003 grams per serving. Given that the recommended daily allowance is 2,300 mg for a healthy person, you're looking at nearly half of your daily sodium intake for a single serving. If you're on a low-sodium diet of 1,500 mg max, it's two-thirds of your daily intake.

In contrast, my dish has about 2,400 grams, or about 400 grams per serving. While I wouldn't describe that as "low salt," it's less than half the sodium content of the version made with canned ingredients. Obviously, there's still a good number of calories here, 274 per serving, to be specific.


Green Bean Casserole with Bacon and Mushrooms

1/2 lb. hickory-smoked bacon, cut into 1/4-inch strips
1 sweet onion, diced
Seasoned salt, to taste
8 oz. cremini mushrooms, stems removed and caps thinly sliced
2 lb. green beans, trimmed and cut into 1 1/4-inch pieces
3 tbsp. plus 2 tsp. unsalted butter
3 tbsp. unbleached all-purpose flour
1 cup dry white wine (I used sauvignon blanc)
1 cup milk (skim is fine)
Dash of ground nutmeg
Freshly ground black pepper, to taste
Pinch of cayenne pepper
4 oz. gruyere cheese, shredded
1/2 cup panko crumbs

1. Preheat oven to 350 F.

2. Heat a medium frying pan over medium heat. Add bacon and cook until browned and its fat has rendered. Remove bacon with a slotted spoon. Remove bacon fat in excess of 1 tablespoon (reserve the bacon fat). Add onion, season with salt and cook until softened. Remove from pan. Add a tablespoon of reserved bacon fat back to the pan. Sauté the sliced mushrooms until browned. Remove from pan and set aside in a large bowl with the cooked bacon and onion.

3. Meanwhile, bring a medium saucepan of water to boil. Add the green beans and cook for 3 minutes. Remove the beans transfer to to an ice water bath. When cooled, add to the bowl with the bacon, onion and mushrooms.

4. In a large frying pan, melt butter over medium heat and add flour. Cook, whisking constantly, until lightly browned. Add white wine and whisk to combine. Add milk, season with nutmeg, salt, freshly ground black pepper and cayenne pepper and cook, whisking constantly, until thickened. Reduce heat to medium-low. Add the shredded gruyere cheese and stir with a whisk until melted and combined.

5. While the sauce cooks, heat remaining 2 tsp. butter in a small frying pan over medium-low heat. Add panko, stir to coat with butter and toast lightly on low heat until (do not brown the crumbs).

6. Pour the cheese sauce over the cooked beans, bacon, onion and mushrooms and stir to combine. Transfer to a 9 x 13 baking dish. Spread the toasted panko evenly on top. Bake until heated through and the mixture bubbles a bit, about 20 minutes. If the panko topping isn't browned, heat the oven broiler and broil the casserole for about 30-45 seconds until lightly browned (watch carefully to prevent burning).

Friday, November 8, 2013

Bourbon-Caramel Pumpkin Tart

Bourbon-Caramel Pumpkin Tart

If you want to go all out, and I mean really all out with a pumpkin dessert this year, skip the pumpkin pie and make this incredible Bourbon-Caramel Pumpkin Tart recipe from Fine Cooking. The dessert is gorgeous and tastes just as good as it looks. No one will miss the pie.

I won't lie: it's definitely more work than pumpkin pie, but worth it. There are four separate components to make: the tart shell, which is like pie crust but with a little cornmeal that gives it great texture; the pumpkin filling, which is like pumpkin cheesecake; the bourbon-flavored caramel topping; and the candied pumpkin seed topping.


Bourbon-Caramel Pumpkin Tart
Adapted from Bourbon-Caramel Pumpkin Tart, Fine Cooking

Pumpkin seeds:

1 tsp. vegetable oil
1/4 cup toasted pumpkin seeds
1 1/2 tsp. light corn syrup
3/4 tsp. sugar

Tart crust:

1 1/3 cups all-purpose flour, plus more as needed
6 tbsp. fine cornmeal
1 tbsp. sugar
1/2 tsp. kosher salt
8 tbsp. (1 stick) cold unsalted butter, cut into 1/2-inch cubes
1 large egg
1 large egg yolk
1 tbsp. ice water, plus more if needed

Bourbon-caramel sauce:

1/2 cup packed light brown sugar
2 tbsp. unsalted butter, cut into 1/2-inch pieces
1/2 tsp. kosher salt
1 cup heavy cream
1/4 cup bourbon

Filling:

4 oz. cream cheese, softened
1/3 cup packed light brown sugar
1 large egg
1 large egg yolk
3/4 cup plus 2 tbsp. canned pumpkin purée
1 tsp. cinnamon
3/4 tsp. ground ginger
1/4 tsp. grated nutmeg
Pinch of kosher salt
1/2 cup half-and-half

Pumpkin seeds

Make the pumpkin seeds:

1. Preheat oven to 350 F.

2. Line a baking sheet with parchment and brush with oil.

3. Combine pumpkin seeds, corn syrup and sugar in a small bowl. Spread evenly on the lined baking sheet. Bake about 5 minutes, stirring halfway through. Transfer to a plate and, when cooled, break up into small clusters.


Make the tart shell:

1. Add the flour, cornmeal, sugar and salt to a food processor and pulse until combined. Add the butter and pulse until the mixture looks like coarse crumbs.

2. Combine the egg, egg yolk and 1 tbsp. of ice water in a small bowl. Add the egg mixture to the processor and pulse until the mixture just comes together, adding additional ice water if necessary. Form the dough into a round and wrap with plastic wrap. Refrigerate for 30 minutes.

3. Turn dough out onto a floured work surface. Roll the dough out into a 13-inch circle. Carefully transfer the dough to a 9-inch springform pan. Gently press the dough into the bottom and sides of the pan, being careful not to stretch it. Trim any excess dough so the that the dough comes up to about 1/2 inch below the rim of the pan. Cover and refrigerate for at least 30 minutes up to 24 hours.

4. Preheat oven to 350 F with rack in the bottom third of the oven.

5. Prick the bottom of the crust with a fork at 1-inch intervals. Line the top of the dough with a piece of aluminum foil and fill with dried beans, pie weights or spare change (spare change makes great pie weights and doesn't result in ruined beans). Bake until the sides are firm, about 15 minutes. Carefully remove the foil and pie weights and bake the crust for another 10 minutes until the bottom is firm (note: I actually forgot to put it back in the oven for the second bake and it turned out fine). Remove from the oven and allow to cool for at least 15 minutes.

Make the caramel sauce:

1. Combine brown sugar, butter and salt in a medium saucepan. Cook over medium heat, stirring frequently until the sugar melts and begins to darken around the edges, about 5 minutes. Carefully whisk in the cream (it will sputter a bit) and simmer, whisking frequently, until the mixture is smooth and thick enough that the whisk leaves the bottom of the pan visible, about 7 to 9 minutes. Add the bourbon and continue simmering, whisking occasionally, until the whisk leaves the bottom of the pan visible again, another 2 minutes. Transfer caramel mixture to a heatproof glass measuring cup.

2. Pour 1/3 cup of the caramel over the bottom of the cooled tart shell. Use a spatula to spread the sauce evenly. Refrigerate for about 15 minutes to set the caramel.


Make the filling and bake:

1. Add the cream cheese and brown sugar to the bowl of a stand mixer and beat on medium speed until light and fluffy, about 2 minutes (alternatively, add to a large bowl and beat with a hand mixer). Add the egg and egg yolk and beat until well combined. Add the pumpkin, cinnamon, ginger, nutmeg and salt and beat until thoroughly combined. Reduce beater speed to low and add the half-n-half.

2. Slowly pour the filling into the prepared tart shell. Bake until the filling has puffed slightly and its surface looks dry, 35 to 40 minutes. Cool on a rack until the filling is completely cooled and firm, about an hour.

Bourbon-Caramel Pumpkin Tart
Finished tart
Finish:

1. Warm the remaining caramel sauce in the microwave in 20-second bursts until pourable. Drizzle caramel over the pumpkin custard and spread it evenly with a spatula. Drop the pumpkin seeds onto the sauce around the edge of the tart shell. Cover and refrigerate for at least 4 hours, up to 1 day.

2. Run a thin knife around the edge of the springform pan and release the pan. Transfer tart to a serving plate and serve chilled.